Does a scientific calculator scares you or your visitor aways from your seat? An online metric conversion site is miles away from your linux desktop internet connection? Worry not, here's a quick tip on how to have an offline metric conversion linux tool that could help most metric and scientific calculations that you might have. Read on.
Linux Metric Conversion Tool
On Fedora, there exist a linux application that can accomplish any metric conversion or most scientific calculations. This metric conversion linux tool can do a wide variety of mathematical conversion and calculations covering areas such as length, size, weight, time, linear, non-linear, speed, pressure, volume, temperature and more known mathematical unit conversions.
More specifically, this linux conversion tool can do 2439 units, 71 prefixes, 33 nonlinear units mathematical conversions in a flash!
What is Units
Units converts an amount from one unit to another, or tells you what mathematical operation you need to perform to convert from one unit to another. The units program can handle multiplicative scale changes as well as conversions such as Fahrenheit to Celsius.
Units Installation on Fedora
As small as 127K of bytes is needed to install units rpm on Fedora. Simply
# yum -y install units
If you want to the list of units this tool is capable of conversion, view /usr/share/units.dat.
Some sample usage:
# units 1hr+1minute seconds
result:* 3660
/ 0.00027322404
The above basically means that 1 hour and 1 minute have 3660 seconds.# units 3ft m
result:
* 0.9144
/ 1.0936133
More unit samples:
# units $5/yard cents/inch
# units 2btu+450ft lbf
# units 1/2kg kg/meter
Execute units without any parameters would give you interactive inputs and results like so# units
You have: sqrt(acre)
You want:
Definition: 63.615034 m
Linux makes desktop operations complete. Enjoy!
Related Post:
Handy Network Linux Diagnostic Tool
Another GTK-based Linux Tool
Linux - Draw that thing from your Mind
Motion Picture and Animation Linux Tool
Get Fedora

Wednesday, April 30, 2008
HowTo: Powerful Metric and Units Linux Conversion Tool


Tuesday, April 29, 2008
HowTo: Prevent Non-Root From Rebooting/Shutting Down The System
Have you experienced a scenario where your users make use of reboot or halt command? Did somebody user just reboot your own server? Do you want to prevent your users from shutting down your linux box or even rebooting it?
Here's a quick entry on how to prevent users from rebooting or shutting down your fedora linux box.
Prevent Non-Root From Using Reboot/Shutdown Commands
In order to avoid non-scheduled downtime of your linux box via reboot/halt/shutdown command usage by non-root users, carefully follow the below three steps
1. Edit /etc/inittab file, find the below line that says
~~~~~~~~~~~~~~~~~~~~~~~~~~~~~~~~~~~~~~~~~~~~~~~~~~~~~~~~~~~~~~~~~~~~~~~~~
ca::ctrlaltdel:/sbin/shutdown -t3 -r now
~~~~~~~~~~~~~~~~~~~~~~~~~~~~~~~~~~~~~~~~~~~~~~~~~~~~~~~~~~~~~~~~~~~~~~~~~
and edit the line to look like
~~~~~~~~~~~~~~~~~~~~~~~~~~~~~~~~~~~~~~~~~~~~~~~~~~~~~~~~~~~~~~~~~~~~~~~~~
ca::ctrlaltdel:ech0 Reboot/Shutdown is not possible at this time.
~~~~~~~~~~~~~~~~~~~~~~~~~~~~~~~~~~~~~~~~~~~~~~~~~~~~~~~~~~~~~~~~~~~~~~~~~
2. Additionally, you can delete,rename, or move the files reboot, poweroff, and halt binary files from /etc/security/console.apps/ directory folder to another binary file names or to a different folder location.
3. Additionally, you can also remove, rename, or change file permissions to these files
/usr/bin/poweroff
/sbin/shutdown
/usr/bin/halt
/usr/bin/reboot
You can also apply these changes to folders where these binary resides, but be careful as some needed binaries are not suid-enabled and cannot be executed specially during boot time that might cause a problem to your setup. Alternatively, the renamed or moved binaries, or aliases can also be set to be immutable at your own discretion.
Take note that when renaming or moving binary files, make sure you remember their new names or command aliases. There are other patch up scenario to avoid users from executing them, but most likely the approach could be the same.
The above scenario are taken without any consideration to selinux settings, sudoers file or jailed ssh user environment or any X-based applications calling those mentioned root binaries.
Goodluck.
HowTo: UDP Connectivity Host Test
Are you wondering how would you be able to test and probe a port that listens for UDP connections? Or how would you test a listening UDP port?
How to test a listening UDP port
If you have managed to create a daemonized service that opens port for UDP connections, here's how to test that listening UDP port for UDP connections. Read on.
To test a listening UDP port, simply use nmap.
# nmap -p [port] -sU -P0 [host name | ip address]
# nmap -p 123 -sU -P0 example.com
# nmap -p 123 -sU -P0 123.123.123.123
From the command shown above, I am assuming that the host example.com is currently serving NTP service on UDP port 123.
Sample opened UDP port output:
~~~~~~~~~~~~~~~~~~~
Starting Nmap 4.52 ( http://insecure.org ) at 2008-04-29 10:56 WAT
Interesting ports on host.example.com (123.123.123.123):
PORT STATE SERVICE
123/udp open|filtered ntp
MAC Address: 00:02:A5:EC:00:8C (Compaq Computer)
Nmap done: 1 IP address (1 host up) scanned in 1.043 seconds
~~~~~~~~~~~~~~~~~~~
Not only you get to test and scan the UDP port, you also get the host's current MAC address.
If you have a closed UDP port, you should be seeing similar lines as shown
~~~~~~~~~~~~~~~~~~~
Interesting ports on localhost (127.0.0.1):
PORT STATE SERVICE
123/udp closed ntp
~~~~~~~~~~~~~~~~~~~
Goodluck.
Similar Posts:
Nmap Port Scanning
Install NMap GUI FrontEnd
List Out Opened Linux Ports
MAC Address Network Scan
HowTo: Secure SSH by Disabling Root Logins
Securing SSH is one major thing on server boxes regardless of server location. Here's one quick tip of adding security to your SSH connection by disabling any root logins.
How to secure SSH by disabling root logins?
To disable direct root logins, edit /etc/ssh/sshd_config file and replace this line
#PermitRootLogin yes
with the below line
PermitRootLogin no
Remember to remove the # comment character. Then restart SSH service
# service sshd restart
Quick tip, enjoy.
HowTo: Retrieve Current Latitude and Longtitude from Linux
Do you know your exact zone longitude and latitude coordinates? Knowing your current zone coordinates won't hurt a bit. Here's how to retrieve latitude and longitude coordinates inside your linux box via terminal.
To pinpoint your latitude and longitude of your current location from your Fedora box, follow the following command sample
How to Retrieve Latitude/Longitude Coordinates from Linux box
# grep -i manila /usr/share/zoneinfo/zone.tab
result:
PH +1435+12100 Asia/Manila
Legend:
First Column : Country Code
Second Column: Latitude and Longitude Coordinates
Third Column: Time Zone (usually following the continent/city format)
Let's try another one.
# grep -i singapore /usr/share/zoneinfo/zone.tab
# grep -i new_york /usr/share/zoneinfo/zone.tab
result:
SG +0117+10351 Asia/Singapore
That's it.
Friday, April 18, 2008
HowTo: Install Wallpapoz
What is Wallpapoz?
Wallpapoz application enables you to configure Gnome desktop wallpapers in unique way. You could have Gnome desktop wallpaper changes when the specified time has passed. The most important feature is you could have Gnome desktop wallpaper changes when you change workspace. This simply means you could group your wallpapers into specific workspace. Wallpapoz offers quick orientation cues where you are. You can manage it so when you change to first workspace, your desktop wallpaper will be picked from wallpapers group for that workspace. When you change to second workspace, it will be picked from wallpapers group for second workspace. So you could have situation like this. You change to third workspace and you will get cartoon desktop wallpaper (wallpapers group for that workspace consists of cartoon wallpapers only). You change to fourth workspace and you will get abstract desktop wallpaper (wallpapers group for that workspace consists of abstractwallpapers only). I think you get the idea. Off course you can disable this feature if you just want your desktop wallpaper changes when the specified time (specified by you) has passed and does not change when you change workspace.
Wallpapoz Run Time
Wallpapoz application consist of two programs.
First is "wallpapoz". "wallpapoz" is the program to make the configuration file. What wallpapers
do you want to use? It just like that. So before doing anything else, run this program first. The file configuration is located in $HOME/.wallpapoz/ .wallpapoz.xml. Although you can edit the file with text editor, I don't recommend it. If the file is corrupted, then remove it first before run
"wallpapoz" again. Don't run "wallpapoz" if the file is corrupted.
Second is the daemonized wallpapoz version. "daemon_wallpapoz" is the "real" program it self. The program will read the configuration file and will change the wallpaper if you change the work-
space or the specified time has passed (depended on your options in configuration file).
You can run the "daemon_wallpapoz" from "wallpapoz" program.You can terminate it too from there.
If you are happy enough, you can start automatically running this program when you load the gnome desktop by adding "daemon_wallpapoz" to gnome session start up program.
Wallpapoz Fedora Installation
Wallpapoz is python based linux application that can easily be installed into Fedora desktop via yum like so
# yum -y install walpapoz
Wallpapoz Webshots


Wallpapoz is here!
That is all folks. Check this out.
HowTo: Join Two Text Files with Common Columnar Field via Terminal
From my recent post, we have covered to merge data contents two text files without a common columnar field. We have also covered joining two text files into one text file separated by a delimiter character. Now, from this post, we are going to go thru merging two text files with a common columnar field. Read on.
HowTo: Join Two Text Files with Common Columnar Field via Terminal
Say we have two text files, namely test1.txt and test2.txt, with data content as follows# cat test1.txt
first Fedora
second Redhat
third CentOS# cat test2.txt
first Core 9
second Enterprise Version
third Free OS
Now, the simplest approach to merge data contents of text-based file is by using linux join command like so
# join test1.txt test2.txt
result:
first Fedora Core 9
second Redhat Enterprise Version
third CentOS Free OS
As you noticed, the two text files are basically merged using the common columnar fields namely first, second and third words.
To make it a little bit complex, here we would be joining the first field of the first text file with the second field of the second text file, that would simply be# join -o 1.1 -o 2.2 test1.txt test2.txt
result:
Fedora Core
Redhat Enterprise
CentOS Free
The above join command matched the first field of first text file with the second field of the second text file.
Here's another one matching the second columnar data field of the first text file with the third columnar field of the second text file.# join -o 1.2 -o 2.3 test1.txt test2.txt
result:
Fedora 9
Redhat Version
CentOS OS
Basically, using this approach, text files with and without common field can be joined and merged together with or without consideration to specific field columns,and saved to as another set of data text file. This could also be useful to UNIX text files mostly used by banks and to text files that needs to be merged and joined for a common data use.
Cool. Today is Friday, have a nice weekend!
If you have just subscribed recently and you are new around here, here are my old linux quick tips.
50 Quick Linux Terminal Command Tips Part 1
50 Quick Linux Terminal Command Tips Part 2
50 Quick Linux Terminal Command Tips Part 3
50 Quick Linux Terminal Command Tips Part 4
And if you are more on linux gaming, check out these 113 amazing fedora games. Thanks!
Wednesday, April 16, 2008
HowTo: Copy and Paste A Text File into Another Text File via Terminal
Yes, you read correct. This time around, we are going to paste data content of one text file into another text file and we are going to approach this issue using linux command via terminal. This one could be easily done inside X or GNOME, but let us assume we are going to do it from a linux system without X, say server or remote non-X linux box, something like that.
Let's start.
Let us view two example of text files namelyh textfile1.txt and textfile2.txt
# cat textfile1.txt
RedHat
Fedora
CentOS
# cat textfile2.txt
Enterprise Version
Core Version 9
Linux Distro
Now, let us merge or combine two text files using the linux paste command
# paste textfile1.txt textfile2.txt
result:
RedHat Enterprise Version
Fedora Core Version 9
CentOS Linux Distro
Making it permanent as file would be as easy as
# paste textfile1.txt textfile2.txt > output.txt
Did you noticed that the contents of textfile2.txt was merged with the data contents of textfile1.txt? Noticed also the fixed columnar width making the 2nd column word vertically aligned.
Merging two text file using paste could be very useful on specific scenarios of merging related data contents.
Here's another scenario.
# cat test1.txt
Citybank
Citybank
BPI Bank
Citybank
# cat test2.txt
New York, USA
San Francisco, USA
Manila, Philippines
London, UK
Again, using paste to merge contents of first file and second text file
# paste test1.txt test2.txt
result:
Citybank New York, USA
Citybank San Francisco, USA
BPI Bank Manila, Philippines
Citybank London, UK
If you want to insert a delimeter character between two columnar data or data field, that could be done using the same linux paste command like so
# paste -d", " test1.txt test2.txt
result:
Citybank,New York, USA
Citybank,San Francisco, USA
BPI Bank,Manila, Philippines
Citybank,London, UK
Neat and nice, isn't it? Hope you enjoy it, and oh, it was an old idea reminded to me by pinoyskull.
Merging two text files with a common field or column marker would be my next post, so watch out for it. And sorry for late updates, been very busy these past few weeks.
Related Posts:
Merging Linux Non-Text and Binary Files
Concatenating Multiple Linux Files
Simple Linux Text Line Formatter
Math the Beauty and Linux the Beast
Retrieve MySQL data via Bash Shell
Saturday, April 12, 2008
HowTo: Install Ioncube PHP Encoder/Decoder
Are you a PHP geek coder by profession or by hobby? Do you ever wish to hide your PHP source codes but still sell it to the market without even buyers having to view your PHP source codes?
If your intention is to hide PHP codes of your work and still distribute it, read on.
How To Install IonCube PHP Encoder in Fedora 8
1. Register and download the latest Ioncube PHP Encoder from here. We are going to go through installing Ioncube PHP Encoder via .tar.gz installation method.
2. Unpack the files and copy to default PHP module folder location like so
# tar ioncube-encoder.tar.gz
# cd ioncube
Copy the latest .so file into your PHP module folder like so
# cp ioncube_loader_lin_5.2.so /usr/lib/php/modules/
The module name, module version and PHP module folder could be different from your platform.
3. There are two ways to install Ioncube PHP Encoder, one is via PHP. Edit your /etc/php.ini
After the line [PHP], insert the next line
zend_extension = /usr/lib/php/modules/ioncube_loader_lin_5.2.so
Save and exit.
4. Now, if you are serving your web pages from /var/www/html/test1 , simply copy
# cp ioncube-encoded-file.php /var/www/html/test1
# cp ioncube-loader-helper.php /var/www/html/test1
5. Restart Apache and browse the above two Ioncube PHP Encoder PHP test files
# service httpd restart
If you installation is successful, you should be seeing similar lines like
~~~~~~~~~~~~~~~~~~~~~~~~~~~~~~~~~~~~~~~~~~~~~~~~~~~~~~~~~~
This file has been successfully decoded. ionCube Loaders are correctly installed.
An ionCube encoded file has been loaded successfully.
Encoded files should now function correctly.
~~~~~~~~~~~~~~~~~~~~~~~~~~~~~~~~~~~~~~~~~~~~~~~~~~~~~~~~~~
If Ioncube encoder tells you that your code has expired, simply re-register and download a new copy of the Ioncube PHP encoder file for evaluation purposes.
If problem persist, consult Ioncube but basically, browsing ioncube-loader-helper.php should be helpful enough.
Get a grip of Ioncube here. That is all, enjoy the weekend.
Wednesday, April 2, 2008
HowTo: Identify your IPv4/IPv6 Loopback Address
Most likely, administrators are familiar with IPv4 and IPv6 loop back address. The need to identify and reach IPv4/IPv6 loop back IP addresses remains basic but a need to know knowledge.
Here's a quick entry on how to identify IPv4/IPv6 loop back address status. Read on.
IPv4 Loop back Address
IPv4 loopback address typically refers to your network interface IPv4 loop back address. Here's how to identify and test your loopback address from linux terminal.
# ping localhost
# ping 127.0.0.1
The above ping commands gives you similar lines shown below
64 bytes from 127.0.0.1: icmp_seq=1 ttl=64 time=0.026 ms
64 bytes from 127.0.0.1: icmp_seq=2 ttl=64 time=0.026 ms
More detailed explanations of ping results has been bloged here.
IPv6 Loop Back Address
The loopback address on an IPv6 network however is 0:0:0:0:0:0:0:1 which is basically abbreviated as ::1. If you want to test your network interface from your platform where IPv6 is enabled by default, you can type
# ping ::1
That is all, thanks.
Tuesday, April 1, 2008
HowTo: Get Disk, Partition And Folder Space Usage
Quick and brief.
Here's a swift blog entry on how to retrieve and get disk usage of the following items:
a. directory folder
b. mounted disk partition
c. disk
To get the disk usage of a folder and return a human readable summarized usage
# du -sh /folder1
# du -sh /folder1/folder2
# du -sh /folder1 /folder2
To get the disk usage of a mounted partition
# du -sh /mnt/windows
# du -sh /mnt/ISO
# du -sh /mnt/USB
To get the disk usage of each folder on current working directory
# du -sh .
To get the disk usage of a folder excluding specific files, like excluding all MP3 files.
# du -sh /folder1/folder2 --exclude='*.mp3'
# du -sh /folder1 --exclude='*.jpg'
To get the disk usage of disk partition or mounted partition
# df -ah
# df -ah /dev/sda1
# df -ah /dev/sda1 /dev/sda2
To get the default partition usage where a system user belongs to
# df -ah ~username
The above shows the total usage of the partition where the user's default home partition belongs to.
That is all. Enjoy.
Related Articles:
More Disk Usage on Linux
Monitoring Large MailBox Users
Linux Resource Monitoring Tool
Disk Report Usage Tool
Harddisk Monitoring Linux Tool
Watching How Linux Log File Grows
Sunday, March 30, 2008
Shell: Shortcut To Last Command Line Argument
Have you noticed at times that you have been entering same command line parameter over and over again during a certain portion of your shell works?
Have you ever been tired of entering the last command line argument over and over again?
Here's a quick and simple short tip on how to execute shortcut combination keys to make that long-typing parameter words easy to shell redo again.
If you were trying CD into a particular folder like
# cd /home/www/cpanel/com/level2/shared/customers/public_html
bash: cd: /home/www/cpanel/com/level2/shared/customers/public_html: No such file or directory
Now, enter the combination short cut keys for entering the last parameter like so
# mkdir !*
# cd !*
# ls -la !*
The above '!*' would be substituted by /home/www/cpanel/com/level2/shared/customers/public_html when executed by bash.
Wednesday, March 26, 2008
HowTo: Motion Picture Linux Paint and Retouching Tool
Have you been told that Holywood uses Linux tools and software too? Do you know one? Read on.
CinePaint is a painting and retouching tool primarily used for motion picture frame-by-frame retouching and dust-busting. CinePaint was used on THE LAST SAMURAI, HARRY POTTER and many other films. From The Last Samurai movie,CinePaint was used to add flying arrows. It's also being used by pro photographers who need greater color fidelity than is available in other tools.
CinePaint runs on all popular flavors of Linux and on Mac OS X as an X11 application. CinePaint for Windows is still on development as of this writing.
CinePaint is different from other painting tools because it supports deep color depth image formats up to 32 bits per channel deep. For comparison, GIMP is limited 8-bit, and Photoshop to 16-bit.
CinePaint was originally based on GIMP and consequently is a GTK1-based application. A new FLTK-based version of CinePaint, called Glasgow, is nearing alpha. There's also a new image core in development, called img_img, That will enable CinePaint to operate on images from the
command-line and to integrate with other projects such as Blender.
Top Reasons to Use CinePaint
1. Support for 8-bit, 16-bit and 32-bit color channels of deep paint.
2. High fidelity image file types such as DPX, OpenEXR and 16-bit TIFF. These files can't be opened in ordinary 8-bit image applications (e.g., GIMP) without crushing them.
3. High Dynamic Range. HDR images can go brighter than white. Ordinary images can't be brighter than a white sheet of paper (0=black, 1.0=white).
4. Gallery-quality printing. B&W photographs have only one color channel and degrade quickly when manipulated as 8-bit images. CinePaint has higher fidelity and offers a 16-bit printing path to the print-head using GutenPrint.
5. Color Management System. CinePaint uses LittleCMS.
6. Flipbook. Movie playback of short sequences of images in RAM.
7. Innovation. CinePaint offers features that go beyond ordinary painting tools.
8. It's used to make feature films at major studios.
9. Open Source. With various OSS licenses, because it uses code from various sources, including GPL, LGPL, BSD, and MPL.
10. Free.
11. Friendly professional developers. Polite discussion forums.
12. Being a CinePaint developer can be a good career move. CinePaint developers have gotten jobs at companies such as DreamWorks Animation, Sony Pictures Imageworks, and Apple.
Top Reasons Not to Use CinePaint
1. You're content with Adobe Photoshop, Corel Painter X, Corel Paint Shop Pro, GIMP, Krita, or Seashore.
2. No working Windows CinePaint version.
3. We're resolving build and packaging issues with the Mac version.
4. CinePaint originated as a rewrite of the GIMP 8-bit engine in 1998 and still superficially resembles GIMP. (CinePaint reuses code from many projects, not just GIMP.)
Cinema Paint Installation
Fedora Project supports Cinema Paint, and can be installed using yum like so
# yum -y install cinepaint
The above command downloads CinePaint binary installer which is about 5MB.
Binary CinePaint Launch
# cinepaint
At first run, the binary package prompts for installation folder destination, where in it will install itself. Simply supply your destination location.
If you deal on digital images, pictures, and photos on your daily basis, Cinema Paint is a great cool tool for you to start with for a better change. To know more of Cinema Paint and documentation, you can visit their site here.
CinePaint Webshots


Related Articles:
Image Magic with Linux ImageMagick
JPG to MPG and HowTo?
Web Photo Album from your Desktop
Mind-Mapping Labyrinth Linux Tool
GIF to PNG and HowTo?
Paint with Tux - TuxPaint
Website Thumbnail in Linux
Photos and Videos under the Hood
Thursday, March 13, 2008
HowTo: Convert First Letter of Dir Folder to Uppercase
Well, if we can convert the first letter of each lines from a text file, we can use the same approach to convert the first letter of a directory or folder name to its uppercase as well, simply add the linux mv command.
If you have hundreds of directory name in one location that starts their directory folder name with small letters, and you with to rename directory where its first letter is in uppercase form, read on.
With reference to recent post, here is a short entry where you can convert all first letter of all directory folder names into its uppercase form.
How To Convert First Letter of Directory Folder To Its Uppercase Form
Taking a longer approach would be like creating an executable bash shell script like so
# cat rename-folder.sh
~~~~~~~~~~~~~~~~~~~~~~~~~~~~~~~~~~~~~~~~~~~~~~~~~~~~~~~~~~~~~~~~~
#!/bin/bash
ls -la | grep dr | grep -v "\." | awk '{print $8}' | while read -r FOLDER
do
newfoldername=`echo $FOLDER | sed -e 's/\(.\)\(.*\)/\u\1\2/'`
echo OLD Name: [$FOLDER] TO NEW Name: [$newfoldername]
# You know what to do from this line -
# Rename the old to new
# using mv linux command
done
~~~~~~~~~~~~~~~~~~~~~~~~~~~~~~~~~~~~~~~~~~~~~~~~~~~~~~~~~~~~~~~~~
Enjoy the weekend.
Wednesday, March 12, 2008
HowTo: Lightning Speed Big Claws
Who gets tired of Thunderbird and Evolution mail client software? How about, "You've Got Claws Mail!"
Do you want to try a new GTK+-based lightweight but heavy duty email client for linux?
Let's give Claws a shot.
What is Claws?
Claws Mail is an email client (and news reader), based on GTK+, which offers a lightweight, full featured, with wide array of email plugins for email clients. Claws provides quick interactive response, graceful, and sophisticated email client interface, grandma-type easy configuration, intuitive operation with abundant mail client features, mail extensibility, robustness and stability.
Claws' appearance and GUI interface are designed to be familiar to new users coming from other popular email clients, like Outlook users,Gmail users as well as experienced users. Almost all commands are accessible with the keyboard, just like the now popular GMail.
Email messages are managed in the standard MH format, which features fast access and data security. You'll be able to import your emails from almost any other email client, and export them just as easily how grandma does it.
Want more? Claws has lots of extra functionality, like an RSS aggregator, calendar, or laptop LED handling - these are provided by extra plugins.
Claws on Fedora
Yes, Fedora got it for you. Claws can easily be downloaded from Fedora repos using the old-timer Fedora rpm package installer called yum.
Claws Installation on Fedora
# yum -y install claws
Claws Plugins
Additionally, Claws supports a very wide array of mail client plugins. Some of these Claws plugins can be easily installed using yum and are listed below.
claws-mail-plugins-acpi-notifier.i386 : ACPI notification plugin for claws-mail
claws-mail-plugins-attachwarner.i386 : attachment warner plugin for claws-mail
claws-mail-plugins-att-remover.i386 : Attachments remover plugin for claws-mail
claws-mail-plugins-bogofilter.i386 : Bogofilter plugin for claws-mail
claws-mail-plugins-cachesaver.i386 : A cache saving plugin
claws-mail-plugins-clamav.i386 : Clamav antivirus plugin for claws-mail
claws-mail-plugins-dillo.i386 : Dillo HTML viewer plugin for claws-mail
claws-mail-plugins-fetchinfo.i386 : Inserts headers containing some download information
claws-mail-plugins-gtkhtml2-viewer.i386 : GTK Html Viewer
claws-mail-plugins.i386 : Additional plugins for claws-mail
claws-mail-plugins-mailmbox.i386 : Support for mailboxes in mbox format
claws-mail-plugins-newmail.i386 : Write a msg header summary to a log file
claws-mail-plugins-notification.i386 : New mail notifications
claws-mail-plugins-pdfviewer.i386 : PDF Viewer plugin for claws-mail
claws-mail-plugins-perl.i386 : Extended filtering engine
claws-mail-plugins-pgp.i386 : PGP plugin for signing and encrypting mail
claws-mail-plugins-rssyl.i386 : RSS plugin for claws-mail
claws-mail-plugins-smime.i386 : S/MIME signed and/or encrypted
claws-mail-plugins-spamassassin.i386 : Spamassassin plugin for claws-mail
claws-mail-plugins-spam-report.i386 : Report spam mail to various places
claws-mail-plugins-synce.i386 : Keeping the addressbook of a Windows CE device in sync
claws-mail-plugins-tnef.i386 : Tnef message parsing
claws-mail-plugins-vcalendar.i386 : vCalendar message handling
To install all of the above Claws plugins, simply
# yum -y install claws-mail-plugins*
Claws is fast and is convincing as an alternative linux mail client. You should try it, its pretty neat and very easy to get along with, no to mention a lot of plugins available for mail feature extensibility.
Claws Screenshot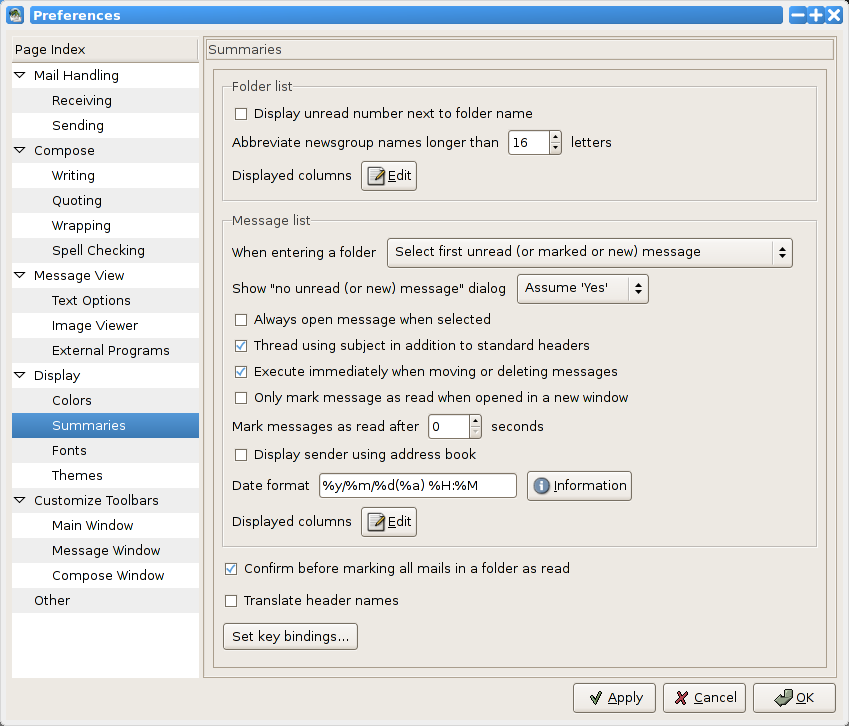
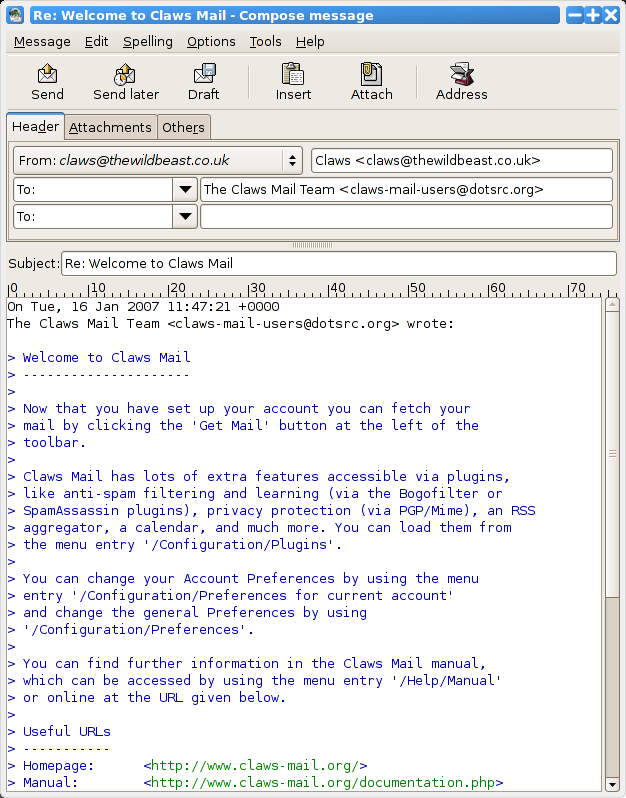
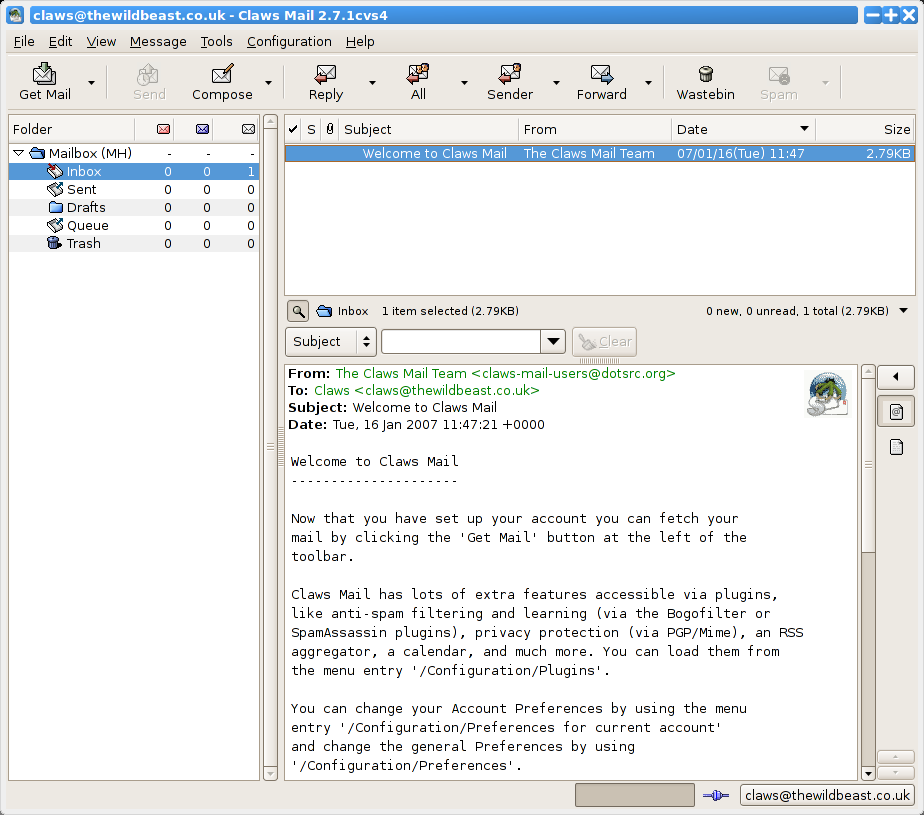
Tuesday, March 11, 2008
HowTo: Convert First Letter of Text Line to Uppercase
Real quick and easy, I just need to drop it here as I was using it most of the times handling tens of thousand keyword text files.
If you need to convert the first letter of the word or first letter of a text line to its uppercase, read on.
Here's how to convert the first letter of a word from text files.
Say, we have thousands of text lines like
# cat testfile.txt
~~~~~~~~~~~~~~~~~~~~~~~~~
linux blog
sysad linux blog
systems admin blog
linux blogs
fedora blog
foss
gnu
...
...
gnome
redhat blog
linux blogging
~~~~~~~~~~~~~~~~~~~~~~~~~
and we wish to convert all first letters of each lines to its uppercase letter or capitalized form.
Am going to approach this using one of the powerful command-line drive linux tool called sed. Here's how it can be simply done.
# cat testfile.txt | sed -e 's/\(.\)\(.*\)/\u\1\2/'
Alternatively,
# sed -e 's/\(.\)\(.*\)/\u\1\2/' testfile.txt
which gives you a similar output like so
~~~~~~~~~~~~~~~~~~~~~~~~~
Linux blog
Sysad linux blog
Systems admin blog
Linux blogs
Fedora blog
Foss
Gnu
Gnome
Redhat blog
Linux blogging
~~~~~~~~~~~~~~~~~~~~~~~~~
Hope this helps, enjoy!
Some Articles
Why Choose Fedora over Ubuntu?
Fedora vs RHEL
Thursday, March 6, 2008
HowTo: Automatically Change your Fedora Desktop Wallpaper
How to selectively change your desktop wallpaper automatically?
How to automatically change your desktop wallpaper every N minutes?
How to add wallpaper management program into your linux desktop?
How to add wallpaper panel into your GNOME panel?
Here's a quick post of how to have a wallpaper tray installed into your GNOME.
What is Wallpaper Tray
Wallpaper Tray is a GNOME applet used for changing your wallpaper. Wallpaper Tray is a utility for the Gnome Desktop Panel. You add the applet to your panel, and use it to manage and display your wallpaper collection.
Wallpaper Tray Program Operation
Wallpaper Tray program offers flexibility and convenience from wallpaper files handling and displaying. Users can customize the number of minutes on changing desktop wallpapers. Wallpaper files specific folders can be added anytime from wallpaper tray preferences and options. Randomly chosen wallpapers by wallpaper tray program can be displayed in a variety of ways.
Wallpapers can be displayed stretched, centered, scaled or as it is wallpaper display basis. Wallpaper selection can be done randomly, sorted by date, or alphabetically depending on user's choice of selection. What more you can ask for your desktop wallpaper management, wallpaper tray also supports changing of desktop wallpaper every time user logons.
Wallpaper Tray, as the name suggests, used to be live in the Notification Area. The Notification Area was never really meant for programs such as this, so the latest release uses the Gnome Panel.
The wallpaper tray applet lets you add directories, wallpapers are then randomly selected at login or at a given interval. You can also search your wallpaper collection, and delete wallpapers you don't like anymore.
Wallpaper Installation
Fedora supports rpm binary package for wallpaper tray. To install, simply
# yum -y install wp_tray
The above wallpaper tray installation downloads around 530K of binary and library dependencies for GNOME. After successful wallpaper tray installation, there is no need to restart your X or GNOME.
Screenshots:

Give wallpaper a shot, you might have fun with it!
Related Posting:
Dock Everything Into Your Linux Desktp System Tray
Monitor your Network Card Send and Receive From Your Desktop System Tray
Internet Connection Speed Applet into your System Tray
WinAmmp-Style Docked Music Applet
Draw What Your Mind Tells You in Linux
Tuesday, March 4, 2008
HowTo: Extremely Powerful Linux Password Sniffer
Password Sniffer on Linux?
Yep, we all need to be informed of passwords being sniffed out! I would not entail those details and cover specific issues of identifying your network securities as that would be large enough to be covered here and case to case basis.
However, those two words are being mentioned here and repeated again, password sniffer, is no different from somebody stealing your identify or bank earnings.
This quick blog entry focuses awareness of the threat on packet sniffing in a switched environment, and briefly explores the effect having a switched network environment. But does not discuss more on packet sniffing operations and usage.
What is DSniff?
DSniff can be defined in two words - password sniffer.
What is NOT DSniff ?
DSniff is not tcpdump, ncap, it is not openssl, nor an exact replica of libpcap or related to ping commands.
More DSniff Network Penetration Testing Intentions
Dsniff was created with a clear intention of network auditing that includes network and host penetration testing from linux platform. DSniff can sniff passwords while packets are traveling on specific type of network. If you don't know what that means, stop here and go check your GMail for funny pictures.
Moreover, DSniff can handle passwords coming and being covered thru and by FTP, Telnet, SMTP, HTTP, POP, poppass, NNTP, IMAP, SNMP, LDAP, Rlogin, RIP, OSPF, PPTP, MS-CHAP, NFS, VRRP, YP/NIS, SOCKS, X11, CVS, IRC, AIM, ICQ, Napster, PostgreSQL, Meeting Maker, Citrix ICA, Symantec
pcAnywhere, NAI Sniffer, Microsoft SMB, Oracle SQL*Net, Sybase and Microsoft SQL auth info.
How DSniff Works?
Simply put, DSniff automatically detects and minimally parses each application protocols, only saving those interesting bits, that means DSniff sniffs out unique authentication login attempts from protocol frames only. Full TCP/IP reassembly is provided by libnids, a dependency requirement by DSniff, which would be installed as well.
THIS PROGRAM SHOULD NOT BE ABUSED, IT IS BEING HERE FOR THE PURPOSE OF NETWORK PENETRATION TESTING ONLY AND NOT FOR ANY ILLEGAL ACTIVITY THAT THIS MIGHT LEAD YOU.
Do not install this, you've been warned.
DSniff Installation on Fedora 8
Yes, Fedora 8 has it. Simply install it using the all time favorite software installer called yum.
DSniff currently supports three platforms OpenBSD (i386), Redhat Linux (i386), and Solaris (sparc). Others have reported success on FreeBSD, Debian Linux, Slackware Linux, AIX, and HP-UX.
# yum -y install dsniff
DSniff, when installed is composed of several binary linux tools for the purpose of further network auditing and security penetration testing. These DSniff tools have different penetration testing functions and are designed to work independently to each other making use of single but powerful libnids linux library.
~~~~~~~~~~~~~~~~~~~~~~~~~~~~~~~~~~~~~~~~~~~~~~~
Here are several binaries included with DSniff.
~~~~~~~~~~~~~~~~~~~~~~~~~~~~~~~~~~~~~~~~~~~~~~~
arpspoof
redirect packets from a target host (or all hosts) on the LAN intended for another local host by forging ARP replies. this is an extremely effective way of sniffing traffic on a switch. kernel IP forwarding (or a userland program which accomplishes the same, e.g. fragrouter :-) must be turned on ahead of time.
dnsspoof
forge replies to arbitrary DNS address / pointer queries on the LAN. this is useful in bypassing hostname-based access controls, or in implementing a variety of man-in-the-middle attacks (HTTP, HTTPS, SSH, Kerberos, etc).
filesnarf
saves selected files sniffed from NFS traffic in the current working directory.
macof
flood the local network with random MAC addresses (causing some switches to fail open in repeating mode, facilitating sniffing). a straight C port of the original Perl Net::RawIP macof program.
mailsnarf
a fast and easy way to violate the Electronic Communications Privacy Act of 1986 (18 USC 2701-2711), be careful. outputs selected messages sniffed from SMTP and POP traffic in Berkeley mbox format, suitable for offline browsing with your favorite mail reader (mail -f, pine, etc.).
msgsnarf
record selected messages from sniffed AOL Instant Messenger, ICQ 2000, IRC, and Yahoo! Messenger chat sessions.
sshmitm
SSH monkey-in-the-middle. proxies and sniffs SSH traffic redirected by dnsspoof(8), capturing SSH password logins, and optionally hijacking interactive sessions. only SSH protocol version 1 is (or ever will be) supported - this program is far too evil already.
tcpkill
kills specified in-progress TCP connections (useful for libnids-based applications which require a full TCP 3-whs for TCB creation).
tcpnice
slow down specified TCP connections via "active" traffic shaping. forges tiny TCP window advertisements, and optionally ICMP source quench replies.
urlsnarf
output selected URLs sniffed from HTTP traffic in CLF (Common Log Format, used by almost all web servers), suitable for offline post-processing with your favorite web log analysis tool (analog, wwwstat, etc.).
webmitm
HTTP / HTTPS monkey-in-the-middle. transparently proxies and sniffs web traffic redirected by dnsspoof(8), capturing most "secure" SSL-encrypted webmail logins and form submissions.
webspy
sends URLs sniffed from a client to your local Netscape browser for display, updated in real-time (as the target surfs, your browser surfs along with them, automagically). a fun party trick.
DSniff Binary Usage
Sorry, I cannot go further with DSniff usage. But this might tire your eyes.
Webshots
Webshots for this is dangerous and being avoided.
Goodluck and enjoy.
Saturday, March 1, 2008
HowTo: Recover Missing Portmap on Fedora 8
Are these lines familiar to you?~~~~~~~~~~~~~~~~~~~~~~~~~~~~~~~~~~~~~~~~~~~~~~~~~~~~~~~~~~~~~~~~
# service portmap status
portmap: unrecognized service
# service nfs start
Cannot register service: RPC: Unable to receive; errno = Connection refused
rpc.rquotad: unable to register (RQUOTAPROG, RQUOTAVERS, udp).
~~~~~~~~~~~~~~~~~~~~~~~~~~~~~~~~~~~~~~~~~~~~~~~~~~~~~~~~~~~~~~~~
I have been receiving quite a large emails asking me to cover portmap again on Fedora 8. From an old post, I have covered a brief guide on how to install portmap on Fedora 7. As we all know, portmap was still available from earlier release versions of Fedora until Fedora 8 was born.
What makes portmapping service important?
The rpcbind utility is a server that converts RPC program numbers into universal addresses. Portmap or rpcbind must be running on the host to be able to make RPC calls on a server on that machine.
Portmap Installation on Fedora 8
Well, here goes an entry on how to install/recover a missing/lost portmap daemon service on Fedora 8 distro.# yum -y install rpcbind
Yes, you read it right. Portmap is RPCBind on Fedora 8
Portmap or RPCBind Daemon Service Activation
# service rpcbind start
Now, you can start playing with NFS server.
Non-related Articles:
Have you tried to do yum from your own computer CD/DVD drive on Fedora?
Are you blogging from your-own-PC-based Wordpress on Fedora?
Did you give Plone - Content Management System a shot on Fedora?
Have you tried to do yum from your own computer CD/DVD drive on Fedora?
Are you blogging from your-own-PC-based Wordpress on Fedora?
Did you give Plone - Content Management System a shot on Fedora?
Thursday, February 28, 2008
HowTo: Extract Lines That Started With Matching String Using Grep
From recent post of displaying the first occurrence of line that starts with a specified matching string, now instead of the first occurrence, here's a way of stripping out all matching lines that start with the given matching string.
Reproducable Approach
Say for example, we have a text file with the below contents and we need to extract those lines shown in BOLD.
# cat testfile.txt
~~~~~~~~~~~~~~~~~~~~~~~~~~~~~~~~~~~~~~~~~~~~~
my linux sysad blog
daily linux sysad blog
linux systems admin blog
systems admin blog
systems admin blog matching line 2
systems admin blog matching line 3
fedora systems admin blog matching line 4
linux systems admin blog matching line 5
pinoy systems admin blog matching line 6
blogging fedora sysad blog
fedora syad blog
distrowatch and linux distributions
linux systems admin
~~~~~~~~~~~~~~~~~~~~~~~~~~~~~~~~~~~~~~~~~~~~~
Noticed above that the words "systems admin blog" appeared a lot of times from different lines. Our objective is to extract ALL the occurring lines that exactly started with the given query string, which is
Here's how to extract line occurrences that starts with the word "systems admin blog" words. Simply
# grep "^systems admin blog" testfile.txt
Alternatively, using linux pipe
# cat testfile.txt | grep "^systems admin blog"
output:
~~~~~~~~~~~~~~~~~~~~~~~~~~~~~~~~~~~~
systems admin blog
systems admin blog matching line 2
systems admin blog matching line 3
~~~~~~~~~~~~~~~~~~~~~~~~~~~~~~~~~~~~
The above commands comes in useful when you need to extract lines that starts with the given query string from a thousand lines of text files. Simple but useful when managing large text file contents.
Take note that you'll get a different results if you do
# grep "systems admin blog"
That is all folks, enjoy.
HowTo: Delete All Thumbs.db Recursively
An offline messages just arrive from a fedora newbie trying to polish more of his FTP administration skills.
After quite some time of establishing his fully functional FTP server via VSFTP, he then realized that most of their staff with windows-based desktops usually Selects ALL files, Copy and Paste to FTP site, the normal non-techie way. Unaware that selecting all files from currently working windows folder also selects the Thumbs.db file to be uploaded to that same FTP server.
This Thumbs.db file is by the way created by windows OS for the purpose of thumbnailing cached image files, which has a filesize of 23040. If you've 1,000 of that, you just lost 23MB of disk space.
Now, the answer to his question of deleting Thumbs.db file recursively following the same concept with recent postings. This can be simply done using find.
# find ~ftpusername -name "Thumbs.db" -exec rm -rf {} \;
Adding to cron job on every morning or on daily basis would be
01 07 * * * find ~ftpusername -name "Thumbs.db" -exec rm -rf {} \; > /dev/null 2>&1
Goodluck, hope this helps.
Related External Articles:
What Happens After rm -rf / ?
HowTo: Delete All Thumbs.db Recursively
HowTo: Find And Count JPG Files Recursively
Delete Zero-sized Filename Recursively
Find Hidden Linux File Recursively
Move Linux Files Recursively
Rename Linux File Recursively
Delete Files and Folders Recursively
Wednesday, February 27, 2008
HowTo: Handy Linux Network Diagnostic Tool
I should have posted this handy linux command long time ago, which was also mentioned from this link, but not explicitly eloborated.
What is MTR?
Mtr combines the functionality of the traceroute and ping programs in a single network diagnostic tool.
Mtr, when issued, investigates the network connection between the current host where mtr runs on and another host by sending packets with purposely low TTLs. Mtr continues to send packets with low TTL, noting the response time of the intervening routers. This allows mtr to print the response percentage and response times of the internet route to target host. A sudden increase in packetloss or response time is often an indication of bad, maxing out or simply overloaded internet link.
This mtr linux tool comes handy when you need to troubleshoot and isolate internet link between two hosts. Mtr can accept command line parameters as input command customization.
By default, mtr runs with reverse lookup feature enabled, resolving each trace hops to its equivalent hostname rather than IP addresses. Mtr is capable of executing traceroute and ping command both via IPv4 and IPv6, which is quite ready for future IP address worldwide evolution. Packet size and packet counts can also be specified explicitly, which increases command control over packets being sent to and from hosts. Mtr continues to send packets to and from providing statistical traceroute date between hosts including average travel time, latency, traceroute percentage and packet loss, worst and best packet replies and ping echoes.
Interactive commands are also available using mtr. Display mode can be toggled between textual visual display to numerical display, which provides continuous long running convenience over hosts being isolated for possible intermittent links and routes. Fields sorting is also being supported including the order of fields for further display customization.
Mtr Installation
Mtr comes as a single rpm package, which means, it is not part of any linux package and is available from Fedora package. Mtr is installed by default Fedora base installation. To install, simply
# yum -y install mtr
Binary Usage
# mtr google.com
# mtr ilovetux.com --no-dns
# mtr --raw gmail.com
# mtr --split googlepages.com
If you have issues with your BGP routing and multi source routes, mtr can be quite handy troubleshooting from linux box level for a more detailed routing isolation and troubleshooting when advanced routing seems so fuzzy.
All in all, mtr comes very handy, not as a replacement but as an alternative and continuous network diagnostic linux tool for ping and traceroute linux binary commands.
That is all, enjoy.
Related Articles:
Linux Magic Ping Command Explicitly Explained
Sending Ping To IP Subnet Blocks
Overly Used and Handy Linux Port Scanning Tool
Sending Ping to Nokia N70
Other Alternative and Interesting Ping Related Commands
Tuesday, February 26, 2008
HowTo: Display Lines That Starts With A Given String
Matching strings can be counted using grep, cat, sed. Matching strings can be sorted and even omitted for matching repetitions using sort and uniq. They can also be highlighted during the string parsing operation via grep. More can be done using awk. But have you ever tried to display the first occurrence of matching line that exactly begins or starts with the given search string?
Our objective is to display only the first line of occurrence that exactly begins with our matching string "blog linux" (shown in bold - 4th line), see below.
# cat testfile.txt
~~~~~~~~~~~~~~~~~~~~~~~~~~~~~~~~~~~~~~~~~~~~
blogger and blogger and linux blog linux
blogging linux blog linux redhat blog linux
blogging sysad blogs fedora linux blog linux
blog linux followed by any words
blogs linux sysad blog linux and blog linux
blogs sysad blog fedora blog linux
fedora blog systems blog linux
linux blog linux blog linux
sysad blog linux blog linux
sysad blogs linux blog linux
systems admin blog linux sysad blog linux
~~~~~~~~~~~~~~~~~~~~~~~~~~~~~~~~~~~~~~~~~~~~
Noticed that the word "blog linux" appeared several times from different lines of that text file. What we only need is the first occurrence of line that started with the word "blog linux" as our matching string.
Here's how to display only those matching line from text file that exactly begins with given search string.
First, we need to sort the input text file like so
# cat testfile.txt | sort | uniq > output.txt
Then, let's look that matching line that begins with our given search string "blog linux". This would be done using linux look binary command.
# look -d "blog linux" output.txt
result:
~~~~~~~~~~~~~~~~~~~~~~~~~~~~~~~~~~
blog linux followed by any words
~~~~~~~~~~~~~~~~~~~~~~~~~~~~~~~~~~
That is all, enjoy.
Random Articles:
Quick MRTG Install Tips
MRTG with SkyStream DVB Router and Satellite Receiver
Nagios Generic Setup and Install Tips
Disk Space Report using Shell
Monitoring Server Hosts via Munin
HowTo: Find And Count JPG Files Recursively
I have been busy playing around with more than 100,000 images and JPG files from my hard drive and I just realized that I was issuing a few set of commands redundantly specially on counting the number of images from categorical 'named' folders alone and from its sub 'event-folders' recursively.
Here's how to find and count JPG image files from subdirectories recursively.
Assuming a list of thousand JPG image files
# cd /images
# ls -la
result:
~~~~~~~~~~~~~~~~~~~~~~~~~~~~~~~~~~~~~~~~~~~~~~~~~~~~~~~~~
drwxr-xr-x 51 root root 4096 2008-02-25 18:10 image00001
..
snip
drwxr-xr-x 51 root root 4096 2008-02-25 18:10 image99999
~~~~~~~~~~~~~~~~~~~~~~~~~~~~~~~~~~~~~~~~~~~~~~~~~~~~~~~~~
From current working folder location, start finding and counting JPG files
# find . -name "*.jpg" | wc -l
By default, the command find searches JPG files recursively on current working directory. It should be able to find the supplied search filename.
Alternatively, creating an alias with the same command could also be convenient
# alias countjpg='find . -name "*.jpg" | wc -l'
Just remember to make it permanent between reboots by simply appending it to your ~/bashrc file.
Other prefers it to be coming from their own bash shell script
# cat /bin/countjpg.sh
output
~~~~~~~~~~~~~~~~~~~~~~~~~~~~~~~~~~~~~~~~~~~~~~~~
#!/bin/bash
clear
echo Recursively counting JPG files on current folder $(pwd) ...
find . -name "*.jpg" | wc -l
~~~~~~~~~~~~~~~~~~~~~~~~~~~~~~~~~~~~~~~~~~~~~~~~
# chmod 700 /bin/countjpg.sh
# countjpg.sh
That is all, enjoy.
Few Most Popular Articles:
Watch and Play 113 Amazing Linux Games?
Enabling Sun Java on Fedora 8
50 Quick Linux Tips Part 1
Monday, February 25, 2008
HowTo: Do Awk with Loop
From recent posts, we have tried to remove the first word by statically specifying the matching string fields using awk and cut.
What if we need to remove the first word but retain the 2nd word up to Nth word of a line from a text file?
Here's a real quick and easy of dynamically looping awk to achieve the above effects.
Now let us try removing the first word while retaining the 2nd word up to the Nth word of a line from any text files.
# cat testfile.txt
~~~~~~~~~~~~~~~~~~~~~~~~~~~~~~~~~~~~~~~~~~~~~~~~~~~~~~~~
Now we have removed the first word while retaining the rest from 2nd to Nth word of a line
~~~~~~~~~~~~~~~~~~~~~~~~~~~~~~~~~~~~~~~~~~~~~~~~~~~~~~~~
# cat testfile.txt | awk '{for(i=2;i<=NF;i++) printf ("%s ", $i);}'
output
~~~~~~~~~~~~~~~~~~~~~~~~~~~~~~~~~~~~~~~~~~~~~~~~~~~~~~~~
we have removed the first word while retaining the rest from 2nd to Nth word of a line
~~~~~~~~~~~~~~~~~~~~~~~~~~~~~~~~~~~~~~~~~~~~~~~~~~~~~~~~
That is all folks.
Sunday, February 24, 2008
HowTo: Strip Out First Word of Line from Text Files
This is a quick post on how to remove the first word of a line.
There are lot of ways on how to remove and strip out the first word of a line from a text file. Here's one way to achieve that.
# cat testfile.txt
~~~~~~~~~~~~~~~~~~~~~~~~~~~~~~~~~~~
my blog name is sysad linux blog
~~~~~~~~~~~~~~~~~~~~~~~~~~~~~~~~~~~
Assuming we need to strip down or remove the word 'my' from the above line, that would be basically easy using linux binary tools. One approach would be using awk like so
Here's how to remove the first word of a line from textfiles using static approach via awk and cut linux tool.
Working on same content of previous file
# cat testfile.txt | awk '{print $2,$3,$4,$5,$6,$7}'
output
~~~~~~~~~~~~~~~~~~~~~~~~~~~~~~~~~~~
blog name is sysad linux blog
~~~~~~~~~~~~~~~~~~~~~~~~~~~~~~~~~~~
Using cut, that would be
# cat testfile.txt | cut -d' ' -f2,3,4,5,6,7
That's it, enjoy.
Related Articles:
Get the Filename Extension Only
Strip Out Directory Path and Filename Suffixes
Removing New Lines and Return Lines from Text Files
Have you ever head of TR in Linux?
Inverting or Reversing Grep Matches
Strip Out Non-Directory Path from Filename
Removing Spaces from Filenames
Removing Blank Lines using Sed Or Grep
50 Quick Linux Command Tips Part 4
Saturday, February 23, 2008
HowTo: Highlight Matching Grep Results
Here's a quick entry on how to have a highlighted and colored text from grep resulting strings and characters.
Assuming we have /var/log/maillog and we wish to grep it with multiple search strings. Well this would be faily simply
# cat /var/log/secure | grep 'Accept\|refuse'
What if we want to make resulting matching grep strings appear in colored text or highlighted text. Highlighted and colored characters or words appear much more highlighted and distinguished specially when you are viewing large number of text lines from a log file.
Here's how to set and kick the ball.
Say from root terminal, simply issue
# alias grep='grep --color=auto'
And try issuing the later command again like so
# cat /var/log/secure | grep 'Accept\|refuse'
Make permanent between reboots for user root.
# echo "alias grep='grep --color=auto'" >> /root/.bashrc
Could be useful on tailing and grepping log files when needed.
Quick and easy. Enjoy.
Friday, February 22, 2008
HowTo: GNOME Commander File Manager
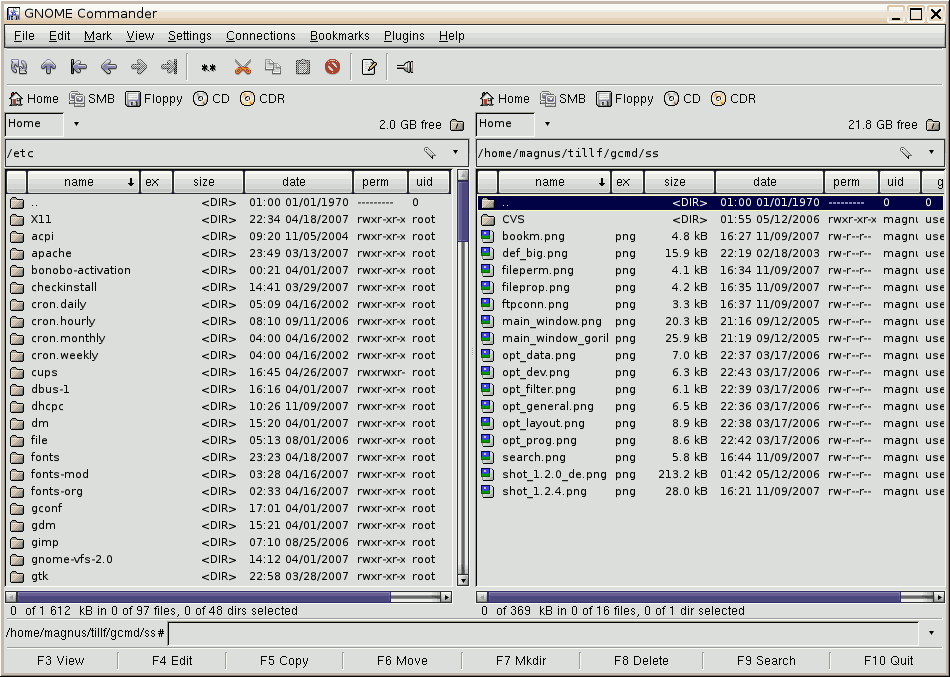
GNOME Commander is a nice and fast file manager for the GNOME desktop. In addition to performing the basic file manager functions, this feature-riched file manager program is also a FTP-client software at the same time. GNOME Commander can also browse shared SMB-networks or SMB-drive.
GNOME Commander is very similar to text-based file manager called midnight commander. GNOME Commander aims to fulfill the demands of more advanced users who like to focus on file management, their work through special applications and running smart commands inside their X display. GNOME Commander can display two-pane file management windows which can is available and controllable on demand and when needed. Shortcut keyboard keys makes file management and operation with your desktop much easier than before.
GNOME Commander Highlight Features:
* GTK-2 GUI with standard mouse interactions.
* Gnome mime types (MIME-Type management under development).
* FTP using GnomeVFS ftp module.
* SAMBA access.
* Right click mouse menu with the usual file operations to run, open, open with.., delete or rename files and folders, and also to set properties like ownership and permissions.
* Mouse context menu that easily can be extended by entries calling any kind of external application like viewers, editors or custom scripts to work on selected files or directories.
* Quick device access buttons with automatic mounting and unmounting ("no-mount" option for just quick access to folders or otherwise automounted devices).
* Latest accessed folder history.
* Folder bookmarks.
* Plugin support under development.
* Fast file viewer for text, images and image meta data (Exif and IPTC)..
* Tools for searching, quick file name search in current dir, symlinking, comparing directories. ...
* A tool for advanced renaming of files supporting various types of meta-data.
* Integrated command line.
GNOME Commander Fedora Installation
# yum -y install gnome-commander
GNOME Commander Binary
# gnome-commander
GNOME Commander File Manager Webshot
That is all, enjoy.
Related Articles:
Thunar File Manager
Linux Profile Manager
Krusader - Two-Pane File Manager
Thursday, February 21, 2008
HowTo: Install Plone CMS on Fedora
From recent Wordpress installation on Fedora system, here's another quick installation howto of Plone - a content management system (CMS) on Fedora system
What is Plone?
Plone is a user friendly and powerful content management system based on Zope. Plone is easy to use, translated into over 35 languages and carefully follows standards. It's under active development and easily extensible with add-on products. Sites powered by plone.
Plone Installation on Fedora
Plone package is available from livna repository. To install livna on Fedora 7, go here, installation on Fedora 8 should be likely similar.
To install Plone CMS on Fedora 8
# yum -y install compat-plone
The above command would download around 13MB of rpm package files.
Learn more of Plone, it's one of nice content management system around.
Similar Article:
WordPress Installation on Fedora 8
Wednesday, February 20, 2008
HowTo: Thumbnail A Website From Linux Command Terminal
Blogging from Wordpress platform enables a blogger to incorporate and activate snapshot plugin where a blogger create on-demand URL snap shots of their websites.
If you are looking for HTML site thumbnailer software available from Linux command lin, read on.
Here's how to create a thumbnail images of URL sites from linux terminal.
Gnome Web Photo contains a thumbnailer that will be used by GNOME applications, including the file manager, to generate screenshots of web pages.
Gnome-Web-Photo Thumbnailer Fedora Installation
To generate thumbnail images using gnome-web-photo
# yum -y install gnome-web-photo
Sample Usage:
Creating thumbnails image of a website or URL site.
# gnome-web-photo -t 0 --mode=thumbnail -w 1152 -s 128 http://www.yahoo.com yahoo.jpg
# gnome-web-photo -t 0 --mode=thumbnail -w 1152 -s 256 http://www.yahoo.com yahoo2.jpg
# gnome-web-photo -t 0 --mode=thumbnail -w 512 -s 256 http://www.google.com google.jpg
After a while, try to view the thumbnail images
# gthumb google.jpg
# gview yahoo.jpg
Gnome-web-photo also supports create snapshot in photo mode which creates a wider and larger version of URL site in photo mode. This feature can also be applied to actual image files from your hard drive, giving you an alternative way to scale down your photo images like so
# gnome-web-photo -w 64 --files /should/have/full/path/food.jpg thumb.jpg
Creating thumbnails images of URL in photo mode for larger image and better quality thumbnail pictures
# gnome-web-photo -t 0 --mode=photo -w 1152 http://www.yahoo.com yehey.jpg ; gthumb yehey.jpg
Sample Created Thumbnail URL Images
That is all, enjoy.
Related Articles:
Photo-Content Management Gallery and System
Thumbnail Apache Linux Module Installation
KDE Photo Library Management
ImageMagic Fedora Installation
Google Picasa Installation HowTo
JPG to MPG File Conversion with Fedora

Make Money


Live Traffic
