From recent post of displaying the first occurrence of line that starts with a specified matching string, now instead of the first occurrence, here's a way of stripping out all matching lines that start with the given matching string.
Reproducable Approach
Say for example, we have a text file with the below contents and we need to extract those lines shown in BOLD.
# cat testfile.txt
~~~~~~~~~~~~~~~~~~~~~~~~~~~~~~~~~~~~~~~~~~~~~
my linux sysad blog
daily linux sysad blog
linux systems admin blog
systems admin blog
systems admin blog matching line 2
systems admin blog matching line 3
fedora systems admin blog matching line 4
linux systems admin blog matching line 5
pinoy systems admin blog matching line 6
blogging fedora sysad blog
fedora syad blog
distrowatch and linux distributions
linux systems admin
~~~~~~~~~~~~~~~~~~~~~~~~~~~~~~~~~~~~~~~~~~~~~
Noticed above that the words "systems admin blog" appeared a lot of times from different lines. Our objective is to extract ALL the occurring lines that exactly started with the given query string, which is
Here's how to extract line occurrences that starts with the word "systems admin blog" words. Simply
# grep "^systems admin blog" testfile.txt
Alternatively, using linux pipe
# cat testfile.txt | grep "^systems admin blog"
output:
~~~~~~~~~~~~~~~~~~~~~~~~~~~~~~~~~~~~
systems admin blog
systems admin blog matching line 2
systems admin blog matching line 3
~~~~~~~~~~~~~~~~~~~~~~~~~~~~~~~~~~~~
The above commands comes in useful when you need to extract lines that starts with the given query string from a thousand lines of text files. Simple but useful when managing large text file contents.
Take note that you'll get a different results if you do
# grep "systems admin blog"
That is all folks, enjoy.
Get Fedora

Thursday, February 28, 2008
HowTo: Extract Lines That Started With Matching String Using Grep
HowTo: Delete All Thumbs.db Recursively
An offline messages just arrive from a fedora newbie trying to polish more of his FTP administration skills.
After quite some time of establishing his fully functional FTP server via VSFTP, he then realized that most of their staff with windows-based desktops usually Selects ALL files, Copy and Paste to FTP site, the normal non-techie way. Unaware that selecting all files from currently working windows folder also selects the Thumbs.db file to be uploaded to that same FTP server.
This Thumbs.db file is by the way created by windows OS for the purpose of thumbnailing cached image files, which has a filesize of 23040. If you've 1,000 of that, you just lost 23MB of disk space.
Now, the answer to his question of deleting Thumbs.db file recursively following the same concept with recent postings. This can be simply done using find.
# find ~ftpusername -name "Thumbs.db" -exec rm -rf {} \;
Adding to cron job on every morning or on daily basis would be
01 07 * * * find ~ftpusername -name "Thumbs.db" -exec rm -rf {} \; > /dev/null 2>&1
Goodluck, hope this helps.
Related External Articles:
What Happens After rm -rf / ?
HowTo: Delete All Thumbs.db Recursively
HowTo: Find And Count JPG Files Recursively
Delete Zero-sized Filename Recursively
Find Hidden Linux File Recursively
Move Linux Files Recursively
Rename Linux File Recursively
Delete Files and Folders Recursively
Wednesday, February 27, 2008
HowTo: Handy Linux Network Diagnostic Tool
I should have posted this handy linux command long time ago, which was also mentioned from this link, but not explicitly eloborated.
What is MTR?
Mtr combines the functionality of the traceroute and ping programs in a single network diagnostic tool.
Mtr, when issued, investigates the network connection between the current host where mtr runs on and another host by sending packets with purposely low TTLs. Mtr continues to send packets with low TTL, noting the response time of the intervening routers. This allows mtr to print the response percentage and response times of the internet route to target host. A sudden increase in packetloss or response time is often an indication of bad, maxing out or simply overloaded internet link.
This mtr linux tool comes handy when you need to troubleshoot and isolate internet link between two hosts. Mtr can accept command line parameters as input command customization.
By default, mtr runs with reverse lookup feature enabled, resolving each trace hops to its equivalent hostname rather than IP addresses. Mtr is capable of executing traceroute and ping command both via IPv4 and IPv6, which is quite ready for future IP address worldwide evolution. Packet size and packet counts can also be specified explicitly, which increases command control over packets being sent to and from hosts. Mtr continues to send packets to and from providing statistical traceroute date between hosts including average travel time, latency, traceroute percentage and packet loss, worst and best packet replies and ping echoes.
Interactive commands are also available using mtr. Display mode can be toggled between textual visual display to numerical display, which provides continuous long running convenience over hosts being isolated for possible intermittent links and routes. Fields sorting is also being supported including the order of fields for further display customization.
Mtr Installation
Mtr comes as a single rpm package, which means, it is not part of any linux package and is available from Fedora package. Mtr is installed by default Fedora base installation. To install, simply
# yum -y install mtr
Binary Usage
# mtr google.com
# mtr ilovetux.com --no-dns
# mtr --raw gmail.com
# mtr --split googlepages.com
If you have issues with your BGP routing and multi source routes, mtr can be quite handy troubleshooting from linux box level for a more detailed routing isolation and troubleshooting when advanced routing seems so fuzzy.
All in all, mtr comes very handy, not as a replacement but as an alternative and continuous network diagnostic linux tool for ping and traceroute linux binary commands.
That is all, enjoy.
Related Articles:
Linux Magic Ping Command Explicitly Explained
Sending Ping To IP Subnet Blocks
Overly Used and Handy Linux Port Scanning Tool
Sending Ping to Nokia N70
Other Alternative and Interesting Ping Related Commands
Tuesday, February 26, 2008
HowTo: Display Lines That Starts With A Given String
Matching strings can be counted using grep, cat, sed. Matching strings can be sorted and even omitted for matching repetitions using sort and uniq. They can also be highlighted during the string parsing operation via grep. More can be done using awk. But have you ever tried to display the first occurrence of matching line that exactly begins or starts with the given search string?
Our objective is to display only the first line of occurrence that exactly begins with our matching string "blog linux" (shown in bold - 4th line), see below.
# cat testfile.txt
~~~~~~~~~~~~~~~~~~~~~~~~~~~~~~~~~~~~~~~~~~~~
blogger and blogger and linux blog linux
blogging linux blog linux redhat blog linux
blogging sysad blogs fedora linux blog linux
blog linux followed by any words
blogs linux sysad blog linux and blog linux
blogs sysad blog fedora blog linux
fedora blog systems blog linux
linux blog linux blog linux
sysad blog linux blog linux
sysad blogs linux blog linux
systems admin blog linux sysad blog linux
~~~~~~~~~~~~~~~~~~~~~~~~~~~~~~~~~~~~~~~~~~~~
Noticed that the word "blog linux" appeared several times from different lines of that text file. What we only need is the first occurrence of line that started with the word "blog linux" as our matching string.
Here's how to display only those matching line from text file that exactly begins with given search string.
First, we need to sort the input text file like so
# cat testfile.txt | sort | uniq > output.txt
Then, let's look that matching line that begins with our given search string "blog linux". This would be done using linux look binary command.
# look -d "blog linux" output.txt
result:
~~~~~~~~~~~~~~~~~~~~~~~~~~~~~~~~~~
blog linux followed by any words
~~~~~~~~~~~~~~~~~~~~~~~~~~~~~~~~~~
That is all, enjoy.
Random Articles:
Quick MRTG Install Tips
MRTG with SkyStream DVB Router and Satellite Receiver
Nagios Generic Setup and Install Tips
Disk Space Report using Shell
Monitoring Server Hosts via Munin
HowTo: Find And Count JPG Files Recursively
I have been busy playing around with more than 100,000 images and JPG files from my hard drive and I just realized that I was issuing a few set of commands redundantly specially on counting the number of images from categorical 'named' folders alone and from its sub 'event-folders' recursively.
Here's how to find and count JPG image files from subdirectories recursively.
Assuming a list of thousand JPG image files
# cd /images
# ls -la
result:
~~~~~~~~~~~~~~~~~~~~~~~~~~~~~~~~~~~~~~~~~~~~~~~~~~~~~~~~~
drwxr-xr-x 51 root root 4096 2008-02-25 18:10 image00001
..
snip
drwxr-xr-x 51 root root 4096 2008-02-25 18:10 image99999
~~~~~~~~~~~~~~~~~~~~~~~~~~~~~~~~~~~~~~~~~~~~~~~~~~~~~~~~~
From current working folder location, start finding and counting JPG files
# find . -name "*.jpg" | wc -l
By default, the command find searches JPG files recursively on current working directory. It should be able to find the supplied search filename.
Alternatively, creating an alias with the same command could also be convenient
# alias countjpg='find . -name "*.jpg" | wc -l'
Just remember to make it permanent between reboots by simply appending it to your ~/bashrc file.
Other prefers it to be coming from their own bash shell script
# cat /bin/countjpg.sh
output
~~~~~~~~~~~~~~~~~~~~~~~~~~~~~~~~~~~~~~~~~~~~~~~~
#!/bin/bash
clear
echo Recursively counting JPG files on current folder $(pwd) ...
find . -name "*.jpg" | wc -l
~~~~~~~~~~~~~~~~~~~~~~~~~~~~~~~~~~~~~~~~~~~~~~~~
# chmod 700 /bin/countjpg.sh
# countjpg.sh
That is all, enjoy.
Few Most Popular Articles:
Watch and Play 113 Amazing Linux Games?
Enabling Sun Java on Fedora 8
50 Quick Linux Tips Part 1
Monday, February 25, 2008
HowTo: Do Awk with Loop
From recent posts, we have tried to remove the first word by statically specifying the matching string fields using awk and cut.
What if we need to remove the first word but retain the 2nd word up to Nth word of a line from a text file?
Here's a real quick and easy of dynamically looping awk to achieve the above effects.
Now let us try removing the first word while retaining the 2nd word up to the Nth word of a line from any text files.
# cat testfile.txt
~~~~~~~~~~~~~~~~~~~~~~~~~~~~~~~~~~~~~~~~~~~~~~~~~~~~~~~~
Now we have removed the first word while retaining the rest from 2nd to Nth word of a line
~~~~~~~~~~~~~~~~~~~~~~~~~~~~~~~~~~~~~~~~~~~~~~~~~~~~~~~~
# cat testfile.txt | awk '{for(i=2;i<=NF;i++) printf ("%s ", $i);}'
output
~~~~~~~~~~~~~~~~~~~~~~~~~~~~~~~~~~~~~~~~~~~~~~~~~~~~~~~~
we have removed the first word while retaining the rest from 2nd to Nth word of a line
~~~~~~~~~~~~~~~~~~~~~~~~~~~~~~~~~~~~~~~~~~~~~~~~~~~~~~~~
That is all folks.
Sunday, February 24, 2008
HowTo: Strip Out First Word of Line from Text Files
This is a quick post on how to remove the first word of a line.
There are lot of ways on how to remove and strip out the first word of a line from a text file. Here's one way to achieve that.
# cat testfile.txt
~~~~~~~~~~~~~~~~~~~~~~~~~~~~~~~~~~~
my blog name is sysad linux blog
~~~~~~~~~~~~~~~~~~~~~~~~~~~~~~~~~~~
Assuming we need to strip down or remove the word 'my' from the above line, that would be basically easy using linux binary tools. One approach would be using awk like so
Here's how to remove the first word of a line from textfiles using static approach via awk and cut linux tool.
Working on same content of previous file
# cat testfile.txt | awk '{print $2,$3,$4,$5,$6,$7}'
output
~~~~~~~~~~~~~~~~~~~~~~~~~~~~~~~~~~~
blog name is sysad linux blog
~~~~~~~~~~~~~~~~~~~~~~~~~~~~~~~~~~~
Using cut, that would be
# cat testfile.txt | cut -d' ' -f2,3,4,5,6,7
That's it, enjoy.
Related Articles:
Get the Filename Extension Only
Strip Out Directory Path and Filename Suffixes
Removing New Lines and Return Lines from Text Files
Have you ever head of TR in Linux?
Inverting or Reversing Grep Matches
Strip Out Non-Directory Path from Filename
Removing Spaces from Filenames
Removing Blank Lines using Sed Or Grep
50 Quick Linux Command Tips Part 4
Saturday, February 23, 2008
HowTo: Highlight Matching Grep Results
Here's a quick entry on how to have a highlighted and colored text from grep resulting strings and characters.
Assuming we have /var/log/maillog and we wish to grep it with multiple search strings. Well this would be faily simply
# cat /var/log/secure | grep 'Accept\|refuse'
What if we want to make resulting matching grep strings appear in colored text or highlighted text. Highlighted and colored characters or words appear much more highlighted and distinguished specially when you are viewing large number of text lines from a log file.
Here's how to set and kick the ball.
Say from root terminal, simply issue
# alias grep='grep --color=auto'
And try issuing the later command again like so
# cat /var/log/secure | grep 'Accept\|refuse'
Make permanent between reboots for user root.
# echo "alias grep='grep --color=auto'" >> /root/.bashrc
Could be useful on tailing and grepping log files when needed.
Quick and easy. Enjoy.
Friday, February 22, 2008
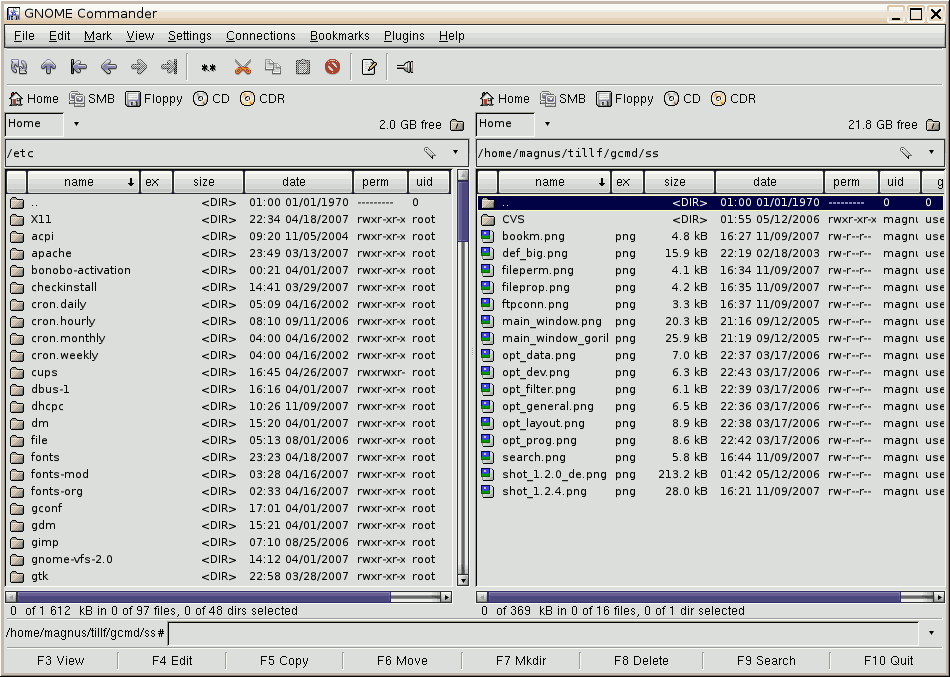
HowTo: GNOME Commander File Manager
GNOME Commander is a nice and fast file manager for the GNOME desktop. In addition to performing the basic file manager functions, this feature-riched file manager program is also a FTP-client software at the same time. GNOME Commander can also browse shared SMB-networks or SMB-drive.
GNOME Commander is very similar to text-based file manager called midnight commander. GNOME Commander aims to fulfill the demands of more advanced users who like to focus on file management, their work through special applications and running smart commands inside their X display. GNOME Commander can display two-pane file management windows which can is available and controllable on demand and when needed. Shortcut keyboard keys makes file management and operation with your desktop much easier than before.
GNOME Commander Highlight Features:
* GTK-2 GUI with standard mouse interactions.
* Gnome mime types (MIME-Type management under development).
* FTP using GnomeVFS ftp module.
* SAMBA access.
* Right click mouse menu with the usual file operations to run, open, open with.., delete or rename files and folders, and also to set properties like ownership and permissions.
* Mouse context menu that easily can be extended by entries calling any kind of external application like viewers, editors or custom scripts to work on selected files or directories.
* Quick device access buttons with automatic mounting and unmounting ("no-mount" option for just quick access to folders or otherwise automounted devices).
* Latest accessed folder history.
* Folder bookmarks.
* Plugin support under development.
* Fast file viewer for text, images and image meta data (Exif and IPTC)..
* Tools for searching, quick file name search in current dir, symlinking, comparing directories. ...
* A tool for advanced renaming of files supporting various types of meta-data.
* Integrated command line.
GNOME Commander Fedora Installation
# yum -y install gnome-commander
GNOME Commander Binary
# gnome-commander
GNOME Commander File Manager Webshot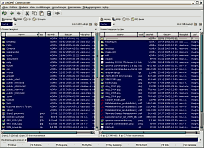
That is all, enjoy.
Related Articles:
Thunar File Manager
Linux Profile Manager
Krusader - Two-Pane File Manager
Thursday, February 21, 2008
HowTo: Install Plone CMS on Fedora
From recent Wordpress installation on Fedora system, here's another quick installation howto of Plone - a content management system (CMS) on Fedora system
What is Plone?
Plone is a user friendly and powerful content management system based on Zope. Plone is easy to use, translated into over 35 languages and carefully follows standards. It's under active development and easily extensible with add-on products. Sites powered by plone.
Plone Installation on Fedora
Plone package is available from livna repository. To install livna on Fedora 7, go here, installation on Fedora 8 should be likely similar.
To install Plone CMS on Fedora 8
# yum -y install compat-plone
The above command would download around 13MB of rpm package files.
Learn more of Plone, it's one of nice content management system around.
Similar Article:
WordPress Installation on Fedora 8
Wednesday, February 20, 2008
HowTo: Thumbnail A Website From Linux Command Terminal
Blogging from Wordpress platform enables a blogger to incorporate and activate snapshot plugin where a blogger create on-demand URL snap shots of their websites.
If you are looking for HTML site thumbnailer software available from Linux command lin, read on.
Here's how to create a thumbnail images of URL sites from linux terminal.
Gnome Web Photo contains a thumbnailer that will be used by GNOME applications, including the file manager, to generate screenshots of web pages.
Gnome-Web-Photo Thumbnailer Fedora Installation
To generate thumbnail images using gnome-web-photo
# yum -y install gnome-web-photo
Sample Usage:
Creating thumbnails image of a website or URL site.
# gnome-web-photo -t 0 --mode=thumbnail -w 1152 -s 128 http://www.yahoo.com yahoo.jpg
# gnome-web-photo -t 0 --mode=thumbnail -w 1152 -s 256 http://www.yahoo.com yahoo2.jpg
# gnome-web-photo -t 0 --mode=thumbnail -w 512 -s 256 http://www.google.com google.jpg
After a while, try to view the thumbnail images
# gthumb google.jpg
# gview yahoo.jpg
Gnome-web-photo also supports create snapshot in photo mode which creates a wider and larger version of URL site in photo mode. This feature can also be applied to actual image files from your hard drive, giving you an alternative way to scale down your photo images like so
# gnome-web-photo -w 64 --files /should/have/full/path/food.jpg thumb.jpg
Creating thumbnails images of URL in photo mode for larger image and better quality thumbnail pictures
# gnome-web-photo -t 0 --mode=photo -w 1152 http://www.yahoo.com yehey.jpg ; gthumb yehey.jpg
Sample Created Thumbnail URL Images
That is all, enjoy.
Related Articles:
Photo-Content Management Gallery and System
Thumbnail Apache Linux Module Installation
KDE Photo Library Management
ImageMagic Fedora Installation
Google Picasa Installation HowTo
JPG to MPG File Conversion with Fedora
Monday, February 18, 2008
HowTo: Advanced Two-Pane File Manager
Have you read the last post of having a two-pane GUI file manager from your desktop linux? Well, here's another round of a much more advanced two-pane file manager.
What is Krusader
Krusader is the result of a 7-year old programming and discussion colloboration of opensource developer to come up with a unique and advance X file manager.
Krusader is an advanced twin panel (commander style) file manager for KDE and other desktops in the *nix world, similar to Midnight or Total Commander. Krusader provides all the file management features you could possibly want. Krusader provides other rich features such as extensive archive handling, mounted filesystem support, FTP, advanced search module, an internal viewer/editor, directory synchronisation, file content comparisons, powerful batch renaming and much much more.
Krusader supports a wide variety of archive formats and can handle other KIO slaves such as smb or fish. Krusader is almost completely customizable, very user friendly, fast and looks great on your desktop!
Krusader Feature Highlights
Highlights:
* Full support for ACL permissions like properties, preserve attributes, synchronizer and other
* Many terminal emulator enhancements bringing new functions, new usages and new look
* Many improvements of the UserAction system
* Countless usability enhancements, especially in Konfigurator and the heavily reordered menubar
* Comparing in the synchronizer interface and parallel threading over slower servers
* Atomic extensions and ability to rename the filename, without extension
* Numerous archive enhancements like handling packing in the background, encryption support, multiple volume archives, compress level
Krusader Installation on Fedora
# yum -y install krusader
Krusader Binary Launch
# krusader
Krusader comes in very handy specially when you're dealing with a lot of directory folders and files. You should give it a shot.
That is all, enjoy.
Some Webshots:

HowTo: Two-Pane GUI File Manager
Implementing a two-pane with GNOME File manager is still under review as an additional nautilus file manager feature. Having a two-pane file manager offers better flexibility, convenience and usability of file management and directory operations, which is unbeatable by any customized shell scripts.
Imagine the days when you have to view all the files and directory folders under the DOS command line environment. Technology of having a GUI-based file manager greatly eases out pains on managing files and folders from our hard drives. Now, imagine a GUI-based file manager with this two-pane X file manager.
Here's how to have a two-pane file manager from your X.
What is emelFM2?
emelFM2 is a file manager for UNIX-like operating systems. emelFM2 uses a simple and efficient interface pioneered by Norton Commander, in the 1980s. The main window is divided into three parts, described as "panes" or "panels". Two of those (side-by-side or top-to-bottom) show the contents of selected filesystem directories. The third pane, at the bottom of the window, shows the output of commands executed within the program. Those panes can be resized, and any one or two of them can be hidden and unhidden, on request. A built-in command-line, toolbar buttons or assigned keys can be used to initiate commands.
emelFM2 is the GTK+2 port of emelFM. emelFM2 is a file manager that implements the popular two-pane design. It features a simple GTK+2 interface, a flexible file typing scheme, and a built-in command line for executing commands without opening an xterm.
The usual file operation is commonly featured such as file deletions, directory folder creation, moving and renaming files, view and edit directory and more!
emelFM2 Fedora Installation
# yum -y emelfm2
Binary Launch
# emelfm2
Try it, it's fun, easy and great having a two-pane file manager around.
Sample Webshots:


Tuesday, February 12, 2008
Slash Proc - File System Utilities
One of the commonly used linux terminal commands are mostly the linux system and monitoring linux tools. Everybody who has been with linux for quite long time, knows that there are lots of built-in linux monitoring tools that comes free and handy from default linux OS installation.
One package that comes with a bunch of linux monitoring commands is procps package.
procps is the package that has a bunch of small useful utilities that give information about processes using, that is why it being referred to forward slash proc filesystem, the /proc filesystem.
The procps package contains a set of system utilities that provide system information. Procps includes ps, free, skill, pkill, pgrep, snice, tload, top, uptime, vmstat, w, watch and pdwx.
The ps command displays a snapshot of running processes.
The top command provides a repetitive update of the statuses of running processes.
The free command displays the amounts of free and used memory on your system.
The skill command sends a terminate command (or another specified signal) to a specified set of processes.
The snice command is used to change the scheduling priority of specified processes.
The tload command prints a graph of the current system load average to a specified tty.
The uptime command displays the current time, how long the system has been running, how many users are logged on, and system load averages for the past one, five, and fifteen minutes.
The w command displays a list of the users who are currently logged on and what they are running.
The watch program watches a running program.
The vmstat command displays virtual memory statistics about processes, memory, paging, block I/O, traps, and CPU activity.
The pwdx command reports the current working directory of a process or processes.
By default Fedora installation, procps is being installed.
Procps Installation
# yum -y install procps
That is all folks.
Related Readings:
Basic Proactive Linux Monitoring
Monitoring USB Devices
Proactive Log File Growth Monitoring
Being Aware of Logged On Users
Linux Process Kill
Linux Process Prioritization and Management
Linux Statistics and Resource Tool
Linux FileSystem Status
HowTo: Drop Down Linux Terminal Console
Are you looking for alternative linux terminal console that offers quite new terminal convenient features?
Here's an alternative linux tool that is available is also available from Fedora repos.
Yakuake - Yet Another Linux Terminal Console
Yakuake, one of the alternative KDE-based linux tool, is a drop-down terminal emulator based on KDE Konsole technology. Yakuake runs in background and pops out as dropdown window when called from shortcut keys. Yakuake also utilizes small memory footprints and therefor provide more memory resources to other linux applications. Yakuake customization is being offered from single point,click and release mouse gesture which makes it more convenient and easier to use. Toogle from one shell to another shell child is as easy as pressing key combinations, which comes as one of the application's default settings.
Yakuake also supports theme and skins. Window transparency is also available from this small but powerful linux terminal console. You can change from one color to another background color customization by simply selecting one of the default color schemes that comes from Yakuake linux terminal console.
Yakuake Key Features:
* Smoothly rolls down from the top of your screen
* Tabbed interface
* Configurable dimensions and animation speed
* Skinnable
* Sophisticated DCOP interface
Yakuake Installation
Simply install Yakuake via yum, which downloads about 82K of rpm package installer.
# yum -y install yakuake
Binary Launch
# yakuake
Some keyboard shortcuts that comes with Yakuake default configuration
Shift+Arrow - jumps from available opened linux terminal console
F12 - drops down terminal console
That is all, enjoy.
Saturday, February 9, 2008
HowTo: Image Magics with ImageMagick
ImageMagick(TM) is an image display and manipulation tool for the X Window System. ImageMagick can read and write JPEG, TIFF, PNM, GIF, and Photo CD image formats. It can resize, rotate, sharpen, color reduce, or add special effects to an image, and when finished you can either save the completed work in the original format or a different one. ImageMagick also includes command line programs for creating animated or transparent .gifs, creating composite images, creating
thumbnail images, and more.
ImageMagick is one of your choices if you need a program to manipulate and dis play images. If you want to develop your own applications which use ImageMagick code or APIs, you need to install ImageMagick-devel as well.
There are times that when installing a particular image application, imagemagic is being searched for as part of its dependencies.
Here are steps of Installing ImageMagick on Fedora 8
ImageMagick Installation
# yum -y install ImageMagick
Says it all,enjoy.
HowTo: Convert JPG Image Files to MPG Video Files
That title is very catchy. Yes, this entry aims to convert a few JPG image files and merged them into one MPG video file using a small handy linux tool. Read on.
What is Kipi?
Kipi (KDE Image Plugin Interface) is an effort to develop a common plugin structure for Digikam, KimDaBa, Showimg and Gwenview. Its aim is to share image plugins among graphic applications. Kipi is based on the old digiKam plugins implementation and is maintened by digiKam team.
One binary that is part of installing kipi is responsible for merging JPG image input files and having a video MPG output files.
Here are the steps to merge and convert multiple JPG files into MPG file?
Kipi Plugin Installation
First, install Kipi Plugins via yum
# yum -y install kipi-plugins
Binary Usage
# images2mpg -f SVCD -d 15 -S 420mpeg2 -o vertito.mpg -i 1.jpg 2.jpg 3.jpg
The above converts 3 jpg files (1.jpg,2.jpg,3.jpg) into a video output file (vertito.mpg) with the default settings of PAL SVCD format. The duration of each JPG image files to each other is 15 seconds.
Looking for NTSC video format?
Convert PNG image files into MPG video?
# images2mpg -n NTSC -t 2 -o vertito.mpg -i *.png
This time around, the transition period between PNG images is 2 second.
How about inserting a WAV sound files while converting JPG/PNG file into MPG video format?
# images2mpg -n NTSC -t 2 -w sweetchildomine.wav -o vertito.mpg -i *.png
Cool. Infact, this tool also supports DVD/XVCD/SVCD/VCD video format convertion so you can watch the movie even from your home DVD player.
That is all, enjoy.
Related Articles
Mind-Mapping Linux Tool
HowTo: Alternative Way to Convert GIF to PNG
Here's an entry on how to convert multiple GIF files into PNG file format from terminal.
There are many ways on converting GIF files to PNG file format. One of them is using a command-line driven gif2png GIF-PNG file image converter.
Description:
The gif2png program converts files from the obsolescent Graphic Interchange Format to Portable Network Graphics. The conversion preserves all graphic information, including transparency, perfectly. The gif2png program can even recover data from corrupted GIFs. There exists a 'web2png' program in a separate package which is able to convert entire directory hierarchies.
GIF2PNG Installation
# yum -y gif2png
Try it
# gif2png -O *.gif
Related Articles:
Screenshot and Snapshot Creation HowTo
Linux Inkscape and not Landscape
Unix to DOS Text File Converter
Convert PDF to XML/PNG/HTML using Linux
Friday, February 8, 2008
HowTo: Lock X While Root With ScreenSaver
Screensaver desktop preferences prevents your screen from being locked using screensaver.
Here's an alternative way of having a screensaver lock your screen while root. Read on.
By default, under System > Preferences > Look and Feel > ScreenSaver preferences does not allow locking of screen if the current logged on user is super root. Now, how to lock your X screen while you're root?
Here's a small linux program that locks the local X display until a password is supplied.
XLockMore
Xlockmore supports a wide array of screensaver types, from big round balls to 3D-enabled screensavers. Xlockmore offers features that most end-users are looking for, idle time outs, password logon failures, screensaver selections, message strings, colors, fonts, display selection and more.
XlockMore Installation
Fedora repos support Xlockmore. To install, simply use yum
# yum -y xlockmore
Xlock Binary
Simply create a taskbar shortcut for calling xlockmore binary
# /usr/bin/xlock
Pacman screensaver is also available, try it
# xlock -mode pacman
That is all, enjoy.
This entry was also mentioned in one of 50 linux tips mentioned here.
Tuesday, February 5, 2008
HowTo: Encrypted Bandwidth-Efficient Linux Backup Powered by Duplicity
If you are looking for another backup linux utility that supports GnuPG encryption mechanism over file and folder data backup and transfer, read on.
Duplicity backs up directories by producing encrypted tar-format volumes and uploading them to a remote or local file server. Because duplicity uses librsync, the incremental archives are space efficient and only record the parts of files that have changed since the last backup. Because duplicity uses GnuPG to encrypt and/or sign these archives, they will be safe from spying and/or modification from the backup server destination or location.
Duplicity supports incremental backup of files and director folders by doing encryption mechanism with GnuPG and uploading them to a remote/local backup file server. In theory many protocols for connecting to a file server could be supported; so far ssh/scp, local file access, rsync, ftp, HSI, WebDAV and Amazon S3 have been written.
Currently duplicity supports deleted files, full unix permissions, directories, symbolic links, fifos, device files, but not hard links. The duplicity package also includes the rdiffdir utility. Rdiffdir is an extension of librsync's rdiff to directories. Rdiffdir can be used to produce signatures and deltas of directories as well as regular files.
Duplicity Installation
Duplicity rpm package is available from Fedora package, thus can be installed using yum like so
# yum -y install duplicity
Duplicity Binary Usage
Here is a basic backup command, which causes duplicity to use scp/ssh to back up /home/vertito from the local system to /usr/backup on another remote host.
# duplicity /home/vertito scp://username@remote.host.com//usr/backup
If the above command is run on repeated basis, the first session will be a full backup, and subsequent ones will be incremental. The --full option can be used to force a full backup.
Now, to exclude a particular folder like /tmp directory folder, this can be done like so
# duplicity --full --exclude /tmp /home/vertito scp://username@remote.host.com//usr/backup
Using duplicity to backup via FTP authentication
# FTP_PASSWORD=mypassword duplicity /home/vertito ftp://username@remote.host.com/ftp_dir
Duplicity Backup Restore
Restore the /home/vertito directory backed up with scp above to directory restored_dir location:
# duplicity scp://username@remote.host.com//usr/backup restored_dir
Quite handy also for bloggers trying to do backup and restore to and from remote locations.
That is all, enjoy.
Related Articles
Linux Backup powered by Rdiff-Backup
Linux Backup powered by RSync
Linux Backup powered by Tar
Linux Backup powered by RSnapShot
HowTo: Install Java IcedTea on Fedora 8
There a lot of java-enabled websites around the globe when visited, checks for specific java version from end users' browser. Most banking institutions does this. Disappointment comes along if you don't have any java package from your Fedora box.
If you are using Fedora and you wish to install the opensourced Java IcedTea java version, read on.
The IcedTea project provides a harness to build the source code from the OpenJDK project using Free Software build tools and provides replacements for the binary plugs with code from the GNU Classpath project.
Getting Sun JDK with Fedora is not possible as of this time and would be not redistributable. With IcedTea which was based on OpenJDK, a Fedora rpm package is available.
Here's how to install Java IcedTea RPM (OpenJDK) package on Fedora 8.
Java IcedTea comes as part of the Fedora 8 OS distro.
To install Java Icedtea from Fedora DVD ISO image file on x86 machine, simply follow like so
# mount -o loop -t iso9660 /ISO/Fedora-8-i386-DVD.iso /F8
# cd /F8/packages
# rpm -ivh java-1.7.0-icedtea-1.7.0.0-0.19.b21.snapshot.fc8.i586.rpm \\ java-1.7.0-icedtea-plugin-1.7.0.0-0.19.b21.snapshot.fc8.i586.rpm
To install Java IcedTea Web Browser Plugin via rpm
# cd /F8/Packages
# rpm -ivh java-1.7.0-icedtea-plugin-1.7.0.0-0.19.b21.snapshot.fc8.i586.rpm
To install Java IcedTea Runtime Environment via rpm
# cd /F8/Packages
# rpm -ivh java-1.7.0-icedtea-1.7.0.0-0.19.b21.snapshot.fc8.i586.rpm
Alternatively, this can be done using yum.
To install Java IcedTea Web Browser Plugin via yum
# yum install java-1.7.0-icedtea-plugin
To install Java IcedTea Runtime Environment via yum
# yum install java-1.7.0-icedtea java-1.7.0-icedtea-devel
You should now be able to run or compile programs with the java and javac programs, respectively, and use the web browser plugin.
Test your java web browser plugin here here.
That is all, enjoy.
Related Java Articles
Sun Java on Fedora 8 Installation
HowTo: Simultaneous Install of Sun Java and Java IcedTea on Fedora
From Fedora OS, if you were trying to issue
# java -version
and it is giving you the below similar output
~~~~~~~~~~~~~~~~~~~~~~~~~~~~~~~~~~~~~~~~~~~~~~~~~~~~~~~~~~~~~~~~~~~~~~~~~
java version "1.5.0"
gij (GNU libgcj) version 4.1.2 20070925 (Red Hat 4.1.2-33)
Copyright (C) 2006 Free Software Foundation, Inc.
This is free software; see the source for copying conditions. There is NO
warranty; not even for MERCHANTABILITY or FITNESS FOR A PARTICULAR PURPOSE.
~~~~~~~~~~~~~~~~~~~~~~~~~~~~~~~~~~~~~~~~~~~~~~~~~~~~~~~~~~~~~~~~~~~~~~~~~
and you wish to have the Sun's Java output version of
~~~~~~~~~~~~~~~~~~~~~~~~~~~~~~~~~~~~~~~~~~~~~~~~~~~~~~~~~~
java version "1.6.0_03"
Java(TM) SE Runtime Environment (build 1.6.0_03-b05)
Java HotSpot(TM) Client VM (build 1.6.0_03-b05, mixed mode, sharing)
~~~~~~~~~~~~~~~~~~~~~~~~~~~~~~~~~~~~~~~~~~~~~~~~~~~~~~~~~~
then read on.
How to make Sun Java's and Java IcedTea's java version co-exists without uninstalling one another?
How to install both Sun Java and Java IcedTea on Fedora 8?
How to use any of the two mentioned java binary versions anytime you need one of them?
From my old post, I have covered the details on how to install Sun's java rpm package on Fedora 8 OS covering the steps of removing a post installed or existing opensourced java-icedtea java version.
Here's how to install Sun Java and Java IcedTea both working on Fedora 8.
First, make sure both Java versions are installed from your Fedora 8 box. Follow respectively.
a. Install Java IcedTea on Fedora 8
b. Install Sun Java on Fedora 8
Now, to confirm which java binary is your default java binary, simply
# java -version
With Java from RedHat GNU, you should see similar lines like
~~~~~~~~~~~~~~~~~~~~~~~~~~~~~~~~~~~~~~~~~~~~~~~~~~~~~~~~~~~~~
java version "1.5.0"
gij (GNU libgcj) version 4.1.2 20070925 (Red Hat 4.1.2-33)
~~~~~~~~~~~~~~~~~~~~~~~~~~~~~~~~~~~~~~~~~~~~~~~~~~~~~~~~~~~~~
For Sun Java, you should be see similar lines like
~~~~~~~~~~~~~~~~~~~~~~~~~~~~~~~~~~~~~~~~~~~~~~~~~~~~~~~~~~~~~
java version "1.6.0_03"
Java(TM) SE Runtime Environment (build 1.6.0_03-b05)
Java HotSpot(TM) Client VM (build 1.6.0_03-b05, mixed mode, sharing)
~~~~~~~~~~~~~~~~~~~~~~~~~~~~~~~~~~~~~~~~~~~~~~~~~~~~~~~~~~~~~
Alternatively, this can be achieved with the same concept like so
# alternatives --config java
The above line would show you your default java binary version too.
Now, if you have installed Java Icedtea package first before Sun's Java, we would then assume that your default Java is from RedHat GNU. Thus, we need to inform Fedora 8 that we now have 2 java binary versions now available from the system.
This can be done by following these next steps.
# alternatives --install /usr/bin/java java /usr/java/jre1.6.0_03/bin/java 2
Verify and confirm that you have 2 java binary available and acknowledged by Fedora 8.
# alternatives --config java
should show you these lines with 1 as your default java.
~~~~~~~~~~~~~~~~~~~~~~~~~~~~~~~~~~~~~~~~~~~~~~~~~~~~~~~~~~~
There are 2 programs which provide 'java'.
Selection Command
-----------------------------------------------
+ 1 /usr/lib/jvm/jre-1.5.0-gcj/bin/java
* 2 /usr/java/jre1.6.0_03/bin/java
~~~~~~~~~~~~~~~~~~~~~~~~~~~~~~~~~~~~~~~~~~~~~~~~~~~~~~~~~~~
To change the default Java binary , simply
# alternatives --config java
and press 2 to select the Sun's Java version and hit Enter. To go back, simply issue the command again and press 1 to choose the default java binary. This concept also works with any other two existing binary from your system, say /usr/local/bin/vertito and /bin/vertito, gets.
Check your browser java plugin here.
I have not mentioned before that uninstalling Java IcedTea package from your Fedora 8 using yum would somehow uninstall Fedora Office applications as well, so be careful.
That's it, enjoy.
Related Articles
Sun Java Installation on Fedora 8 with Java IcedTea Uninstallation
Java IcedTea Installation on Fedora 8 using Yum or RPM
HowTo: Install K9Copy on Fedora
K9Copy Description and Installation
K9Copy is a small utility which allows the copy of DVD on Linux. K9copy facilitates several methods for backing up a DVD and utilizes libdvdcss to circumvent CSS copy protection.
K9copy enables direct backup of a single layer DVD-5 provided the user's computer has a DVD recorder. Likewise, direct backup of a dual layer DVD-9 is possible with a dual layer DVD recorder.
K9copy is able to fit the contents of a dual layer DVD-9 onto a single layer DVD-5. The interface allows a user to explicitly retain or discard any content from the original disc such as video titles, audio tracks, subtitles and the DVD menu. All content selected for backup is compressed to a configurable target size (4400MB by default) and stored on the user's hard drive as either an ISO image file or a DVD VIDEO_TS folder. K9copy can either transfer the backup data to blank DVD±R media itself or utilize external DVD authoring software such as K3b for this task. Furthermore, an ISO image file produced by K9copy can be recorded to DVD by any software on any platform capable of recording ISO images to disc.
Functionality for backing up a DVD to a MPEG-4 file rather than a disc also exists in K9copy. The interface allows the user to select preferred codecs for video and audio as well as a target file size or bit rate for the resulting MPEG-4.
K9copy includes basic DVD authoring capabilities. The DVD video stream is compressed by the program Vamps.
1. Copy without menus :
In this case, dvdauthor is used to create a new DVD structure. It is possible to choose the order in which the video sequences are played.
2. Copy with menus :
As dvdauthor does not make it possible to integrate the original menus, K9Copy reproduces the original structure of the DVD. The navigation packs as well as IFO files are modified to point on the compressed MPEG stream.
K9Copy Installation
Yum downloads less than 2MB of k9copy rpm package.
# yum -y install k9copy
K9Copy Binary
# k9copy
K9Copy Webshots
That is all, enjoy.
Related Articles:
ISO Management on Fedora
DVD ISO Image Md5Sum
ISO Creation and Burning on Fedora via Terminal
Nero Burning Software on Fedora
Yet Another Linux CD/DVD Burning Software
Gnome DVD/CD Burning Application
VCD/DVD Video and DVD Authoring Linux Software
Friday, February 1, 2008
HowTo: More of Fedora Themes Package
As a Fedora user since Fedora Core 1, I have to admit that the default X windows system with Fedora is not that quite sweetened and color-coded. Yes, it has striked a few but more candy-cooking is needed to bling it further. But hey, themes for X themes including icon and application themes are available from Fedora repos.
Here are a few themes available from Fedora repos. These includes X themes, icons themes, and application themes that might sweeten more of your Fedora desktop sweetenings and flavors.
Take note that some of them could take some time specially if you have a very slow internet connection. If you really are interested to get your hands wet with these themes, read on. Remember what they say, install at your own risk.
Before continuing, remember the Fedora yum basics.
a. To install a rpm package,
# yum install packagename
b. To get more information of the rpm package,
# yum info packagename
Now, moving forward with Fedora themes for X, application and icons.
To install Bluecurve Classic metacity theme
# yum -y install bluecurve-classic-metacity-theme.noarch
To install Bluecurve GDM theme
# yum -y install bluecurve-gdm-theme.noarch
To install Bluecurve GNOME theme
# yum -y install bluecurve-gnome-theme.noarch
To install Bluecurve GTK+ theme
# yum -y install bluecurve-gtk-themes.i386
To install Bluecurve icon theme
# yum -y install bluecurve-icon-theme.noarch
To install Bluecurve KDE theme
# yum -y install bluecurve-kde-theme.i386
To install Bluecurve KDM theme
# yum -y install bluecurve-kdm-theme.noarch
To install Bluecurve kwin theme
# yum -y install bluecurve-kwin-theme.i386
To install Bluecurve metacity theme
# yum -y install bluecurve-metacity-theme.noarch
To install Themes editor for Crystal Stacker
# yum -y install crystal-stacker-theme-editor.i386
To install Themes for the Crystal Stacker game
# yum -y install crystal-stacker-themes.noarch
To install Echo icon theme
# yum -y install echo-icon-theme.noarch
To install Themes for Emerald, a window decorator for Compiz Fusion
# yum -y install emerald-themes.noarch
To install FedoraBubbles GDM theme
# yum -y install fedorabubbles-gdm-theme.noarch
To install FedoraDNA GDM theme
# yum -y install fedoradna-gdm-theme.noarch
To install FedoraDNA KDM theme
# yum -y install fedoradna-kdm-theme.noarch
To install FedoraFlyingHigh GDM theme
# yum -y install fedoraflyinghigh-gdm-theme.noarch
To install Fedora Flying High KDM theme
# yum -y install fedoraflyinghigh-kdm-theme.noarch
To install Fedora Infinity GDM theme
# yum -y install fedorainfinity-gdm-theme.noarch
To install Fedora Infinity KDM theme
# yum -y install fedorainfinity-kdm-theme.noarch
To install Fedora Infinity screensaver theme
# yum -y install fedorainfinity-screensaver-theme.noarch
To install Fedora screensaver theme
# yum -y install fedora-screensaver-theme.noarch
To install Ajaxian theme for Gallery 2
# yum -y install gallery2-ajaxian.noarch
To install Carbon theme for Gallery 2
# yum -y install gallery2-carbon.noarch
To install Classic theme for Gallery 2
# yum -y install gallery2-classic.noarch
To install Floatrix theme for Gallery 2
# yum -y install gallery2-floatrix.noarch
To install Hybrid theme for Gallery 2
# yum -y install gallery2-hybrid.noarch
To install Matrix theme for Gallery 2
# yum -y install gallery2-matrix.noarch
To install Siriux theme for Gallery 2
# yum -y install gallery2-siriux.noarch
To install Slider theme for Gallery 2
# yum -y install gallery2-slider.noarch
To install Tile theme for Gallery 2
# yum -y install gallery2-tile.noarch
To install Base gnome icons
# yum -y install gnome-icon-theme.noarch
To install Additional Clearlooks color schemes
# yum -y install gnome-theme-clearlooks-bigpack.noarch
To install A modern Clearlooks theme using a Bluecurve-like color scheme
# yum -y install gnome-theme-curvylooks.noarch
To install Collection of metathemes for the Gnome desktop environment
# yum -y install gnome-themes-extras.noarch
To install Themes collection for GNOME
# yum -y install gnome-themes.noarch
To install Basic requirement for icon themes
# yum -y install hicolor-icon-theme.noarch
To install A script to handle icon names in desktop icon themes
# yum -y install icon-naming-utils.noarch
To install Utility for icon theme generation
# yum -y install icon-slicer.i386
To install Crystal16 theme for Kadu
# yum -y install kadu-theme-crystal16.noarch
To install Crystal22 theme for Kadu
# yum -y install kadu-theme-crystal22.noarch
To install Glass16 theme for Kadu
# yum -y install kadu-theme-glass16.noarch
To install Glass22 theme for Kadu
# yum -y install kadu-theme-glass22.noarch
To install Nuvola16 theme for Kadu
# yum -y install kadu-theme-nuvola16.noarch
To install Nuvola22 theme for Kadu
# yum -y install kadu-theme-nuvola22.noarch
To install Additional artwork (themes, sound themes)
# yum -y install kdeartwork.i386
To install KDE icon themes (kdeclassic, slick)
# yum -y install kdeartwork-icons.i386
To install Theme Manager for KDM
# yum -y install kdmtheme.i386
To install The Nodoka theme for Metacity
# yum -y install nodoka-metacity-theme.noarch
To install The Nodoka Theme Pack for Gnome
# yum -y install nodoka-theme-gnome.noarch
To install additional theme for qgis - nkids
# yum -y install qgis-theme-nkids.i386
To install Unofficial port of the Bluecurve widget theme to Qt 4
# yum -y install qt4-theme-quarticurve.i386
To install Extra Icons from the Tango Project
# yum -y install tango-icon-theme-extras.noarch
To install Icons from Tango Project
# yum -y install tango-icon-theme.noarch
To install Assorted Backgrounds from art.gnome.org
# yum -y install themes-backgrounds-gnome.noarch
To install Icons for Xfce
# yum -y install xfce4-icon-theme.noarch
To install Additional themes for xfwm4
# yum -y install xfwm4-themes.noarch
That is all, and goodluck.
HowTo: European Language Fonts Installation on Fedora
If you are looking for more font types and options for more of your document write ups, here's a quick entry on installing European Language fonts on your Fedora X system.
European language fonts rpm package provides Central European fonts in compliance with the ISO8859-2 standard.
European Language Fonts Installation
This could be real quick and easy.
# yum -y install fonts-ISO8859-2
Short and quick, enjoy.
Related Readings:
Microsfot Fonts Installation on Fedora
Alternative MS TrueType Fonts Installation

Make Money


Live Traffic
